| 501-09 Rear View Mirrors
|
2013 - 2014 Fusion
|
| Diagnosis and Testing
|
Procedure revision date:
03/27/2013
|
Rear View Mirrors
DTC Chart:
Diagnostics in this manual assume a certain skill level and knowledge of Ford-specific diagnostic practices.
REFER to:
Diagnostic Methods
(100-00 General Information, Description and Operation).
|
DTC
|
Description
|
Action
|
|
B1163:11
|
Left Mirror Heater Output: Circuit Short To Ground
|
GO to Pinpoint Test E
|
|
B1163:15
|
Left Mirror Heater Output: Circuit Short To Battery Or Open
|
GO to Pinpoint Test E
|
|
B1C09:11
|
Driver Left/Right Mirror Motor: Circuit Short To Ground
|
|
|
B1C09:15
|
Driver Left/Right Mirror Motor: Circuit Short To Battery Or Open
|
|
|
B1C10:11
|
Driver Up/Down Mirror Motor: Circuit Short To Ground
|
|
|
B1C10:15
|
Driver Up/Down Mirror Motor: Circuit Short To Battery Or Open
|
|
|
B1C13:11
|
Driver Up/Down Mirror Motor Feedback: Circuit Short To Ground
|
GO to Pinpoint Test C
|
|
B1C13:15
|
Driver Up/Down Mirror Motor Feedback: Circuit Short To Battery Or Open
|
GO to Pinpoint Test C
|
|
B1C14:11
|
Driver Left/Right Mirror Motor Feedback: Circuit Short To Ground
|
GO to Pinpoint Test C
|
|
B1C14:15
|
Driver Left/Right Mirror Motor Feedback: Circuit Short To Battery Or Open
|
GO to Pinpoint Test C
|
|
C1B15:11
|
Sensor Supply Voltage B: Circuit Short To Ground
|
GO to Pinpoint Test C
|
|
C1B15:15
|
Sensor Supply Voltage B: Circuit Short To Battery or Open
|
GO to Pinpoint Test C
|
|
All other
DTCs
|
-
|
REFER to:
Locks, Latches and Entry Systems
(501-14 Handles, Locks, Latches and Entry Systems, Diagnosis and Testing).
|
DTC Chart:
Diagnostics in this manual assume a certain skill level and knowledge of Ford-specific diagnostic practices.
REFER to:
Diagnostic Methods
(100-00 General Information, Description and Operation).
|
DTC
|
Description
|
Action
|
|
B1164:11
|
Right Mirror Heater Output: Circuit Short To Ground
|
GO to Pinpoint Test E
|
|
B1164:15
|
Right Mirror Heater Output: Circuit Short To Battery Or Open
|
GO to Pinpoint Test E
|
|
B1C11:11
|
Passenger Left/Right Mirror Motor: Circuit Short To Ground
|
|
|
B1C11:15
|
Passenger Left/Right Mirror Motor: Circuit Short To Battery Or Open
|
|
|
B1C12:11
|
Passenger Up/Down Mirror Motor: Circuit Short To Ground
|
|
|
B1C12:15
|
Passenger Up/Down Mirror Motor: Circuit Short To Battery Or Open
|
|
|
B1C15:11
|
Passenger Up/Down Mirror Motor Feedback: Circuit Short To Ground
|
GO to Pinpoint Test D
|
|
B1C15:15
|
Passenger Up/Down Mirror Motor Feedback: Circuit Short To Battery Or Open
|
GO to Pinpoint Test D
|
|
B1C16:11
|
Passenger Left/Right Mirror Motor Feedback: Circuit Short To Ground
|
GO to Pinpoint Test D
|
|
B1C16:15
|
Passenger Left/Right Mirror Motor Feedback: Circuit Short To Battery Or Open
|
GO to Pinpoint Test D
|
|
C1B15:11
|
Sensor Supply Voltage B: Circuit Short To Ground
|
GO to Pinpoint Test D
|
|
C1B15:15
|
Sensor Supply Voltage B: Circuit Short To Battery or Open
|
GO to Pinpoint Test D
|
|
All other
DTCs
|
-
|
REFER to:
Locks, Latches and Entry Systems
(501-14 Handles, Locks, Latches and Entry Systems, Diagnosis and Testing).
|
DTC Chart:
Diagnostics in this manual assume a certain skill level and knowledge of Ford-specific diagnostic practices.
REFER to:
Diagnostic Methods
(100-00 General Information, Description and Operation).
|
DTC
|
Description
|
Action
|
|
B11C7:46
|
High Beam Sensor: Calibration / Parameter Memory Failure
|
REFER to:
Headlamps
(417-01 Exterior Lighting, Diagnosis and Testing).
|
|
B11C7:97
|
High Beam Sensor: Component or System Operation Obstructed or Blocked
|
REFER to:
Headlamps
(417-01 Exterior Lighting, Diagnosis and Testing).
|
|
B1286:14
|
Interior Mirror: Circuit Short To Ground or Open
|
GO to Pinpoint Test F
|
|
B12D8:11
|
Mirror Heater Output: Circuit Short To Ground
|
GO to Pinpoint Test H
|
|
B12D8:13
|
Mirror Heater Output: Circuit Open
|
GO to Pinpoint Test H
|
|
C1001:78
|
Vision System Camera: Alignment or Adjustment Incorrect
|
This
sets when a new
has been installed without performing the camera alignment. PERFORM the camera alignment using a diagnostic scan tool.
|
|
U0100:87
|
Lost Communication With ECM/PCM "A": Missing Message
|
GO to Pinpoint Test I
|
|
U0104:87
|
Lost Communication With Cruise Control Module: Missing Message
|
GO to Pinpoint Test J
|
|
U0131:87
|
Lost Communication With Power Steering Control Module: Missing Message
|
GO to Pinpoint Test K
|
|
U0140:87
|
Lost Communication With Body Control Module: Missing Message
|
GO to Pinpoint Test L
|
|
U0151:87
|
Lost Communication With Restraints Control Module: Missing Message
|
GO to Pinpoint Test M
|
|
U0155:87
|
Lost Communication With Instrument Panel Cluster (IPC): Missing Message
|
GO to Pinpoint Test N
|
|
U0212:87
|
Lost Communication With Steering Column Control Module: Missing Message
|
GO to Pinpoint Test O
|
|
U0232:87
|
Lost Communication With Side Obstacle Detection Control Module - Left: Missing Message
|
GO to Pinpoint Test P
|
|
U0233:87
|
Lost Communication With Side Obstacle Detection Control Module - Right: Missing Message
|
GO to Pinpoint Test Q
|
|
U0401:00
|
Invalid Data Received From ECM/PCM A: No Sub Type Information
|
This
can set due to a fault in the
or an input to the
. CARRY OUT a self-test of the
and DIAGNOSE any Diagnostic Trouble Codes (DTCs) present. REFER to Refer to the appropriate section in Group 303 for the procedure. REFER to section 3 of the
Manual.
|
|
U0405:00
|
Invalid Data Received From Cruise Control Module: No Sub Type Information
|
This
can set due to a fault in the
or an input to the
. RETRIEVE and REPAIR all non-network Diagnostic Trouble Codes (DTCs) in all modules on the network.
|
|
U0422:00
|
Invalid Data Received From Body Control Module: No Sub Type Information
|
This
can set due to a fault in the
or an input to the
. RETRIEVE and REPAIR all non-network Diagnostic Trouble Codes (DTCs) in all modules on the network.
|
|
U0423:00
|
Invalid Data Received From Instrument Panel Cluster Control Module: No Sub Type Information
|
This
can set due to a fault in the
or an input to the
. RETRIEVE and REPAIR all non-network Diagnostic Trouble Codes (DTCs) in all modules on the network.
|
|
U0429:00
|
Invalid Data Received From Steering Column Control Module: No Sub Type Information
|
This
can set due to a fault in the
or an input to the
. RETRIEVE and REPAIR all non-network Diagnostic Trouble Codes (DTCs) in all modules on the network.
|
|
U0452:00
|
Invalid Data Received From Restraints Control Module: No Sub Type Information
|
This
can set due to a fault in the
or an input to the
. RETRIEVE and REPAIR all non-network Diagnostic Trouble Codes (DTCs) in all modules on the network.
|
|
U1000:11
|
Solid State Driver Protection Activated: Circuit Short To Ground
|
The
has temporarily disabled the camera windshield heater defroster output because an excessive current draw exists (such as
a short to ground). The
cannot enable the output until the cause of the short is corrected. ADDRESS all other
Diagnostic Trouble Codes (DTCs) first. After the cause of the concern is corrected, CLEAR the Diagnostic Trouble Codes (DTCs)
and REPEAT the
self-test to enable the output driver.
|
|
U201A:54
|
Control Module Main Calibration Data: Missing Calibration
|
CHECK the vehicle service history for recent service actions related to this module. This
sets due to incomplete or incorrect Programmable Module Installation (PMI) procedures. If there have been recent service
actions with this module, REPEAT the Programmable Module Installation (PMI) procedure as directed by the diagnostic scan tool.
REFER to:
Module Configuration - System Operation and Component Description
(418-01 Module Configuration, Description and Operation).
If there have been no recent service actions, INSTALL a new module to correct the failure to retain configuration data. REFER to:
Interior Rear View Mirror
(501-09 Rear View Mirrors, Removal and Installation).
|
|
U2100:00
|
Initial Configuration Not Complete: No Sub Type Information
|
CHECK the vehicle service history for recent service actions related to this module. This
sets due to incomplete or incorrect Programmable Module Installation (PMI) procedures. If there have been recent service
actions with this module, REPEAT the Programmable Module Installation (PMI) procedure as directed by the diagnostic scan tool.
REFER to:
Module Configuration - System Operation and Component Description
(418-01 Module Configuration, Description and Operation).
If there have been no recent service actions, INSTALL a new module to correct the failure to retain configuration data. REFER to:
Interior Rear View Mirror
(501-09 Rear View Mirrors, Removal and Installation).
|
|
U2101:00
|
Control Module Configuration Incompatible: No Sub Type Information
|
CHECK the vehicle service history for recent service actions related to this module. This
sets due to incomplete or incorrect Programmable Module Installation (PMI) procedures. If there have been recent service
actions with this module, REPEAT the Programmable Module Installation (PMI) procedure as directed by the diagnostic scan tool.
REFER to:
Module Configuration - System Operation and Component Description
(418-01 Module Configuration, Description and Operation).
If there have been no recent service actions, INSTALL a new module to correct the failure to retain configuration data. REFER to:
Interior Rear View Mirror
(501-09 Rear View Mirrors, Removal and Installation).
|
|
U2200:00
|
Control Module Configuration Memory Corrupt: No Sub Type Information
|
CHECK the vehicle service history for recent service actions related to this module. This
sets due to incomplete or incorrect Programmable Module Installation (PMI) procedures. If there have been recent service
actions with this module, REPEAT the Programmable Module Installation (PMI) procedure as directed by the diagnostic scan tool.
REFER to:
Module Configuration - System Operation and Component Description
(418-01 Module Configuration, Description and Operation).
If there have been no recent service actions, INSTALL a new module to correct the failure to retain configuration data. REFER to:
Interior Rear View Mirror
(501-09 Rear View Mirrors, Removal and Installation).
|
|
U3000:42
|
Control Module: General Memory Failure
|
ADDRESS all other
DTCs. If this
is still present AFTER all other Diagnostic Trouble Codes (DTCs) have been addressed, INSTALL a new interior mirror.
REFER to:
Interior Rear View Mirror
(501-09 Rear View Mirrors, Removal and Installation).
|
|
U3000:49
|
Control Module: Internal Electronic Failure
|
The
has permanently disabled an output because an excessive current draw has occurred more times than the module can withstand.
ADDRESS all other
Diagnostic Trouble Codes (DTCs). If this
is still present AFTER all other
Diagnostic Trouble Codes (DTCs) have been addressed, INSTALL a new interior mirror.
REFER to:
Interior Rear View Mirror
(501-09 Rear View Mirrors, Removal and Installation).
|
|
U3000:93
|
Control Module: No Operation
|
ADDRESS all other
Diagnostic Trouble Codes (DTCs). If this
is still present AFTER all other
Diagnostic Trouble Codes (DTCs) have been addressed, INSTALL a new interior mirror.
REFER to:
Interior Rear View Mirror
(501-09 Rear View Mirrors, Removal and Installation).
|
|
U3000:96
|
Control Module: Component Internal Failure
|
ADDRESS all other
Diagnostic Trouble Codes (DTCs). AFTER all other
Diagnostic Trouble Codes (DTCs) have been addressed, INSTALL a new interior mirror.
REFER to:
Interior Rear View Mirror
(501-09 Rear View Mirrors, Removal and Installation).
|
Symptom Chart(s)
Symptom Chart: Rear View Mirrors - Exterior
Diagnostics in this manual assume a certain skill level and knowledge of Ford-specific diagnostic practices.
REFER to:
Diagnostic Methods
(100-00 General Information, Description and Operation).
NOTE:
Clean the entire mirror assembly and glass to assist in verification of the customer concern and/or impact damage. Do not
clean any mirror glass or housing with an ice scraper, razor blade, abrasive pad, harsh chemicals or petroleum based cleaning
products, as these may damage the mirror glass and/or housing.
|
Condition
|
Possible Sources
|
Action
|
|
The exterior mirror(s) fold inward due to wind pressure
|
Mirror structural bracket is damaged
|
INSPECT the mirror for structural damage. If necessary, INSTALL a new mirror.
REFER to:
Exterior Mirror
(501-09 Rear View Mirrors, Removal and Installation).
|
|
Both exterior mirrors are inoperative
|
-
Wiring, terminals or connectors
-
Exterior mirror control switch (integral to the
front window control switch)
-
|
-
VERIFY that all power windows can be operated normally from the
front window control switch.
-
If all power windows operate normally from the
front window control switch, INSTALL a new
front window control switch.
REFER to:
Front Door Window Control Switch
(501-11 Glass, Frames and Mechanisms, Removal and Installation).
-
If all power window do not operate normally from the
front window control switch, DIAGNOSE the power windows before continuing diagnostics of the exterior mirrors.
REFER to:
Glass, Frames and Mechanisms
(501-11 Glass, Frames and Mechanisms, Diagnosis and Testing).
|
|
The
exterior mirror is inoperative
|
Refer to the Pinpoint Test
|
|
|
The
exterior mirror does not operate correctly in all directions
|
Refer to the Pinpoint Test
|
|
|
The
exterior mirror is inoperative
|
Refer to the Pinpoint Test
|
|
|
The
exterior mirror does not operate correctly in all directions
|
Refer to the Pinpoint Test
|
|
|
One or both heated exterior mirrors is inoperative
|
Refer to the Pinpoint Test
|
GO to Pinpoint Test E
|
|
The
and
heated exterior mirrors do not defrost at the same rate
|
Normal operation
|
No action required, the system is operating correctly at this time.
|
|
The
auto-dimming exterior mirror is inoperative or always in a darkened state
|
Refer to the Pinpoint Test
|
GO to Pinpoint Test F
|
|
The
or
exterior mirror selection switch
is inoperative (exterior mirror selection switch functions normally)
|
Exterior mirror selection switch
|
INSTALL a new left front window control switch.
REFER to:
Front Door Window Control Switch
(501-11 Glass, Frames and Mechanisms, Removal and Installation).
|
|
The puddle lamp in inoperative or always on
|
-
Wiring, terminals or connectors
-
Puddle lamp
-
Door module
|
REFER to:
Interior Lighting
(417-02 Interior Lighting, Diagnosis and Testing).
|
|
The exterior mirror turn indicator is inoperative or always on
|
-
Wiring, terminals or connectors
-
Turn indicator
-
Door module
|
REFER to:
Turn Signal and Hazard Lamps
(417-01 Exterior Lighting, Diagnosis and Testing).
|
|
The Blind Spot Information System (BLIS)® indicator is inoperative and always on
|
-
Wiring, terminals or connectors
-
Exterior mirror glass
-
Door module
|
REFER to:
Blind Spot Information System
(419-04 Side and Rear Vision, Diagnosis and Testing).
|
Symptom Chart: Rear View Mirrors - Interior
Diagnostics in this manual assume a certain skill level and knowledge of Ford-specific diagnostic practices.
REFER to:
Diagnostic Methods
(100-00 General Information, Description and Operation).
NOTE:
Clean the entire mirror assembly and glass to assist in verification of the customer concern and/or impact damage. Do not
clean any mirror glass or housing with an ice scraper, razor blade, abrasive pad, harsh chemicals or petroleum based cleaning
products, as these may damage the mirror glass and/or housing.
|
Condition
|
Possible Sources
|
Action
|
|
The interior mirror is blemished
|
Interior mirror glass/housing is dirty
|
CLEAN the affected interior mirror surface
|
|
The interior auto-dimming mirror does not operate correctly
|
Refer to the Pinpoint Test
|
GO to Pinpoint Test G
|
Symptom Chart: Rear View Mirrors - Noise, Vibration and Harshness (NVH)
Diagnostics in this manual assume a certain skill level and knowledge of Ford-specific diagnostic practices.
REFER to:
Diagnostic Methods
(100-00 General Information, Description and Operation).
NOTE:
Clean the entire mirror assembly and glass to assist in verification of the customer concern and/or impact damage. Do not
clean any mirror glass or housing with an ice scraper, razor blade, abrasive pad, harsh chemicals or petroleum based cleaning
products, as these may damage the mirror glass and/or housing.
|
Condition
|
Possible Sources
|
Action
|
|
Exterior mirror housing vibrates or is loose
|
-
Exterior mirror mounting nuts loose
|
TIGHTEN the exterior mirror mounting nuts.
REFER to:
Exterior Mirror
(501-09 Rear View Mirrors, Removal and Installation).
|
-
Aftermarket air deflector/stone shields
|
If possible, REMOVE the aftermarket parts and ROAD TEST the vehicle. If the concern is no longer present, ADVISE the customer
that the aftermarket components were causing the undesired vibration.
|
|
Exterior mirror glass vibrates or is loose
|
-
Exterior mirror motor mounting screws loose
-
Exterior mirror glass loose
|
PRESS the center of the exterior mirror glass up, down, left and right to make sure that the exterior mirror glass is seated
correctly. If the exterior mirror glass is still loose, REMOVE the exterior mirror glass. INSPECT the exterior mirror backing
plate for damage. INSPECT the exterior mirror motor mounting screws and TIGHTEN if necessary. If the exterior mirror backing
plate is damaged, INSTALL a new exterior mirror glass.
REFER to:
Exterior Mirror
(501-09 Rear View Mirrors, Removal and Installation).
|
|
Wind noise
|
Foam gasket between exterior mirror housing and door is misaligned or damaged
|
VERIFY the gasket is in good condition. If necessary, REPOSITION the gasket between the exterior mirror housing and the door
or REPAIR the foam gasket as necessary. The foam gasket is not serviceable and if it cannot be repaired, INSTALL a new exterior
mirror.
REFER to:
Exterior Mirror
(501-09 Rear View Mirrors, Removal and Installation).
|
|
Exterior mirror is not correctly fitted to the door
|
VERIFY there are no gaps between the exterior mirror and the door. If necessary, LOOSEN the exterior mirror nuts and REPOSITION
the exterior mirror as necessary.
|
|
Exterior mirror impact damage
|
INSPECT the exterior mirror to ensure that there is no damage to the housing or glass.
|
|
The interior mirror vibrates or is loose
|
Interior mirror mounting loose
|
If the mirror is still on the windshield,
do not remove
. ATTEMPT to fully seat the mirror first. If the mirror is still loose or vibrates, REMOVE and REINSTALL the mirror. If the
condition still exists, INSTALL a new interior mirror.
REFER to:
Interior Rear View Mirror
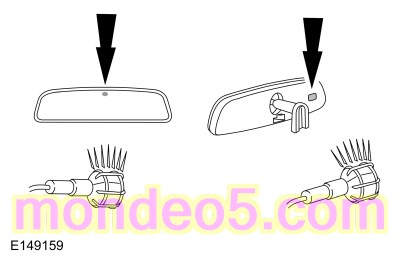
(501-09 Rear View Mirrors, Removal and Installation).
|
Pinpoint Tests
The
Exterior Mirror Is Inoperative Or Does Not Operate Correctly In One Or More Direction(s) (Non-Memory)
Refer to Wiring Diagrams Cell 124 for schematic and connector information.
Normal Operation and Fault Conditions
The
supplies voltage and ground to the
exterior mirror motors based on input provided by the exterior mirror control switch. The
is capable of storing DTCs for the
exterior mirror motor circuits when a concern exists.
Possible Sources
-
Wiring, terminals or connectors
-
Exterior mirror control switch
-
Exterior mirror motor
-
Exterior mirror
-
Visual Inspection and Diagnostic Pre-Checks
Inspect
fuse 25 (30A).
|
|
Description
|
Fault Trigger Conditions
|
|
B1C09:11
|
Driver Left/Right Mirror Motor: Circuit Short To Ground
|
This continuous and on-demand
sets if the
detects a higher than expected current draw when voltage is applied to the horizontal mirror motor circuit.
|
|
B1C09:15
|
Driver Left/Right Mirror Motor: Circuit Short To Battery Or Open
|
This continuous and on-demand
sets if the
detects a lower than expected current draw when voltage is applied to the horizontal mirror motor circuit.
|
|
B1C10:11
|
Driver Up/Down Mirror Motor: Circuit Short To Ground
|
This continuous and on-demand
sets if the
detects a higher than expected current draw when voltage is applied to the vertical motor circuit.
|
|
B1C10:15
|
Driver Up/Down Mirror Motor: Circuit Short To Battery Or Open
|
This continuous and on-demand
sets if the
detects a lower than expected current draw when voltage is applied to the vertical motor circuit.
|
PINPOINT TEST A : THE LH (LEFT-HAND)
EXTERIOR MIRROR IS INOPERATIVE OR DOES NOT OPERATE CORRECTLY IN ONE OR MORE DIRECTION(S) (NON-MEMORY)
| A1
CHECK THE DRIVER DOOR MODULE (DDM) DIAGNOSTIC TROUBLE CODES (DTCS)
|
-
Using a diagnostic scan tool, perform the
self-test.
Are any Diagnostic Trouble Codes (DTCs) present?
| Yes
|
For
B1C09:11 or B1C09:15, GO to
A8
For
B1C10:11 or B1C10:15, GO to
A12
|
|
| A2
CHECK THE EXTERIOR MIRROR SELECTION SWITCH
|
-
Using a diagnostic scan tool, monitor the MIR_SEL
.
-
Operate the exterior mirror selection buttons to select the
and then
exterior mirrors.
Does the MIR_SEL
match the selector switch in both positions?
|
| A3
CHECK THE EXTERIOR MIRROR CONTROL SWITCH
|
-
Using a diagnostic scan tool, monitor the PM_POS_SW
.
-
Press the exterior mirror control switch in the left, right, up and down directions.
Does the PM_POS_SW
match the control switch in all directions?
|
| A4
CHECK THE LH (LEFT-HAND)
MIRROR COMMON CIRCUIT FOR VOLTAGE AT THE LEFT HAND (LH) EXTERIOR MIRROR
|
-
Disconnect
Exterior Mirror.
-
Connect:
|
Lead 1
|
Measurement / Action
|
Lead 2
|
|
C516-4
|

|
Ground
|
-
Select the
mirror on the exterior mirror selection switch.
-
While monitoring the test light, press the exterior mirror control switch in the left and down directions.
Does the test light illuminate ONLY when the exterior mirror control switch is pressed in the left and down directions?
| No
|
If the test light is illuminated when the exterior mirror control switch is not pressed in any direction, GO to
A5
If the test light does not illuminate when the exterior mirror control switch is pressed in the left and down directions,
GO to
A6
|
|
| A5
CHECK THE COMMON CIRCUIT FOR A SHORT TO VOLTAGE AT THE LH (LEFT-HAND)
EXTERIOR MIRROR
|
-
Measure:
|
Positive Lead
|
Measurement / Action
|
Negative Lead
|
|
C516-4
|

|
Ground
|
Is any voltage present?
|
| A6
CHECK THE COMMON CIRCUIT FOR AN OPEN BETWEEN THE LH (LEFT-HAND)
EXTERIOR MIRROR AND THE DDM (DRIVER DOOR MODULE)
|
-
Measure:
|
Positive Lead
|
Measurement / Action
|
Negative Lead
|
|
C516-4
|

|
C501B-17
|
Is the resistance less than 3 ohms?
|
| A7
CHECK THE COMMON CIRCUIT FOR A SHORT TO GROUND AT THE LH (LEFT-HAND)
EXTERIOR MIRROR
|
-
Measure:
|
Positive Lead
|
Measurement / Action
|
Negative Lead
|
|
C516-4
|
|
Ground
|
Is the resistance greater than 10,000 ohms?
|
| A8
CHECK FOR VOLTAGE TO THE HORIZONTAL MOTOR CIRCUIT AT THE LH (LEFT-HAND)
EXTERIOR MIRROR
|
-
Disconnect
Exterior Mirror.
-
Connect a test light between:
|
Lead 1
|
Measurement / Action
|
Lead 2
|
|
C516-6
|
|
Ground
|
-
Select the
mirror on the exterior mirror selection switch.
-
Monitor the test light while pressing the exterior mirror control switch in the right direction.
Does the test light illuminate ONLY when the exterior mirror control switch is pressed in the right direction?
| No
|
If the test light is illuminated when the exterior mirror control switch is not pressed in any direction, GO to
A9
If the test light does not illuminate when the exterior mirror control switch is pressed in the right direction, GO to
A10
|
|
| A9
CHECK THE HORIZONTAL MIRROR CIRCUIT FOR A SHORT TO VOLTAGE AT THE LH (LEFT-HAND)
EXTERIOR MIRROR
|
-
Measure:
|
Positive Lead
|
Measurement / Action
|
Negative Lead
|
|
C516-6
|
|
Ground
|
Is any voltage present?
|
| A10
CHECK THE HORIZONTAL MOTOR CIRCUIT FOR A SHORT TO GROUND AT THE LH (LEFT-HAND)
EXTERIOR MIRROR
|
-
Measure:
|
Positive Lead
|
Measurement / Action
|
Negative Lead
|
|
C516-6
|
|
Ground
|
Is the resistance greater than 10,000 ohms?
|
| A11
CHECK THE HORIZONTAL MOTOR CIRCUIT FOR AN OPEN BETWEEN THE LH (LEFT-HAND)
EXTERIOR MIRROR AND THE DDM (DRIVER DOOR MODULE)
|
-
Measure:
|
Positive Lead
|
Measurement / Action
|
Negative Lead
|
|
C516-6
|
|
C501B-8
|
Is the resistance less than 3 ohms?
|
| A12
CHECK FOR VOLTAGE TO THE VERTICAL MOTOR CIRCUIT AT THE LH (LEFT-HAND)
EXTERIOR MIRROR
|
-
Disconnect
Exterior Mirror.
-
Connect a test light between:
|
Lead 1
|
Measurement / Action
|
Lead 2
|
|
C516-3
|
|
Ground
|
-
Select the
mirror on the exterior mirror selection switch.
-
Monitor the test light while pressing the exterior mirror control switch in the up direction.
Does the test light illuminate ONLY when the exterior mirror control switch is pressed in the up direction?
| No
|
If the test light is illuminated when the exterior mirror control switch is not pressed in any direction, GO to
A13
If the test light does not illuminate when the exterior mirror control switch is pressed in the up direction, GO to
A14
|
|
| A13
CHECK THE VERTICAL MIRROR CIRCUIT FOR A SHORT TO VOLTAGE AT THE LH (LEFT-HAND)
EXTERIOR MIRROR
|
-
Measure:
|
Positive Lead
|
Measurement / Action
|
Negative Lead
|
|
C516-3
|
|
Ground
|
Is any voltage present?
|
| A14
CHECK THE VERTICAL MOTOR CIRCUIT FOR A SHORT TO GROUND AT THE LH (LEFT-HAND)
EXTERIOR MIRROR
|
-
Measure:
|
Positive Lead
|
Measurement / Action
|
Negative Lead
|
|
C516-3
|
|
Ground
|
Is the resistance greater than 10,000 ohms?
|
| A15
CHECK THE VERTICAL MOTOR CIRCUIT FOR AN OPEN BETWEEN THE LH (LEFT-HAND)
EXTERIOR MIRROR AND THE DDM (DRIVER DOOR MODULE)
|
-
Measure:
|
Positive Lead
|
Measurement / Action
|
Negative Lead
|
|
C516-3
|
|
C501B-7
|
Is the resistance less than 3 ohms?
|
| A16
CHECK FOR CORRECT DDM (DRIVER DOOR MODULE)
OPERATION
|
-
Disconnect and inspect all
connectors.
-
Repair:
-
corrosion (install new connector or terminals - clean module pins)
-
damaged or bent pins - install new terminals/pins
-
pushed-out pins - install new pins as necessary
-
Reconnect the
connectors and all previously disconnected exterior mirror system connectors. Make sure all connectors seat and latch correctly.
-
Operate the system to determine if the concern is still present.
Is the concern still present?
| Yes
|
CHECK
for any applicable Technical Service Bulletins (TSBs). If a
exists for this concern, DISCONTINUE this test and FOLLOW the
instructions. If no Technical Service Bulletins (TSBs) address this concern, INSTALL a new
.
REFER to:
Driver Door Module (DDM)
(419-10 Multifunction Electronic Modules, Removal and Installation).
|
| No
|
The system is operating correctly at this time. The concern may have been caused by module connections. ADDRESS the root cause
of any connector or pin issues.
|
|
| A17
CHECK THE EXTERIOR MIRROR JUMPER HARNESS
|
-
Inspect the exterior mirror jumper harness between the vehicle harness and the mirror motors for:
-
open or short circuits
-
damaged or pushed out pins
-
corrosion
Is the harness OK?
| Yes
|
INSTALL a new exterior mirror motor.
REFER to:
Exterior Mirror
(501-09 Rear View Mirrors, Removal and Installation).
|
| No
|
REPAIR the harness as necessary. If the harness cannot be repaired, INSTALL a new exterior mirror.
REFER to:
Exterior Mirror
(501-09 Rear View Mirrors, Removal and Installation).
|
|
The
Exterior Mirror Is Inoperative Or Does Not Operate Correctly In One Or More Direction(s) (Non-Memory)
Diagnostic Overview
Diagnostics in this manual assume a certain skill level and knowledge of Ford-specific diagnostic practices.
REFER to:
Diagnostic Methods
(100-00 General Information, Description and Operation).
Refer to Wiring Diagrams Cell 124 for schematic and connector information.
Normal Operation and Fault Conditions
The
supplies voltage and ground to the
exterior mirror motors based on input provided by the exterior mirror control switch. The
is capable of storing DTCs for the
exterior mirror motor circuits when a concern exists.
Possible Sources
-
Wiring, terminals or connectors
-
Exterior mirror control switch
-
Exterior mirror motor
-
Exterior mirror
-
Visual Inspection and Diagnostic Pre-Checks
Inspect
fuse 26 (30A).
|
|
Description
|
Fault Trigger Conditions
|
|
B1C11:11
|
Passenger Left/Right Mirror Motor: Circuit Short To Ground
|
This continuous and on-demand
sets if the
detects a higher than expected current draw when voltage is applied to the horizontal mirror motor circuit.
|
|
B1C11:15
|
Passenger Left/Right Mirror Motor: Circuit Short To Battery Or Open
|
This continuous and on-demand
sets if the
detects a lower than expected current draw when voltage is applied to the horizontal mirror motor circuit.
|
|
B1C12:11
|
Passenger Up/Down Mirror Motor: Circuit Short To Ground
|
This continuous and on-demand
sets if the
detects a higher than expected current draw when voltage is applied to the vertical motor circuit.
|
|
B1C12:15
|
Passenger Up/Down Mirror Motor: Circuit Short To Battery Or Open
|
This continuous and on-demand
sets if the
detects a lower than expected current draw when voltage is applied to the vertical motor circuit.
|
PINPOINT TEST B : THE RH (RIGHT-HAND)
EXTERIOR MIRROR IS INOPERATIVE OR DOES NOT OPERATE CORRECTLY IN ONE OR MORE DIRECTION(S) (NON-MEMORY)
| B1
CHECK THE PDM (PASSENGER DOOR MODULE)
DIAGNOSTIC TROUBLE CODES (DTCS)
|
-
Using a diagnostic scan tool, perform the
self-test.
Are any Diagnostic Trouble Codes (DTCs) present?
| Yes
|
For
B1C11:11 or B1C11:15, GO to
B8
For
B1C12:11 or B1C12:15, GO to
B12
|
|
| B2
CHECK THE EXTERIOR MIRROR SELECTION SWITCH
|
-
Using a diagnostic scan tool, monitor the MIR_SEL
.
-
Operate the exterior mirror selection buttons to select the
and then
exterior mirrors.
Does the MIR_SEL
match the selector switch in both positions?
|
| B3
CHECK THE EXTERIOR MIRROR CONTROL SWITCH
|
-
Using a diagnostic scan tool, monitor the PM_POS_SW
.
-
Press the exterior mirror control switch in the left, right, up and down directions.
Does the PM_POS_SW
match the control switch in all directions?
|
| B4
CHECK THE MIRROR COMMON CIRCUIT FOR VOLTAGE AT THE RH (RIGHT-HAND)
EXTERIOR MIRROR
|
-
Disconnect
Exterior Mirror.
-
Connect:
|
Lead 1
|
Measurement / Action
|
Lead 2
|
|
C601-4
|
|
Ground
|
-
Select the
mirror on the exterior mirror selection switch.
-
Monitor the test light while pressing the exterior mirror control switch in the left and down directions.
Does the test light illuminate ONLY when the exterior mirror control switch is pressed in the left and down directions?
| No
|
If the test light is illuminated when the exterior mirror control switch is not pressed in any direction, GO to
B5
If the test light does not illuminate when the exterior mirror control switch is pressed in the left and down directions,
GO to
B6
|
|
| B5
CHECK THE COMMON CIRCUIT FOR A SHORT TO VOLTAGE AT THE RH (RIGHT-HAND)
EXTERIOR MIRROR
|
-
Measure:
|
Positive Lead
|
Measurement / Action
|
Negative Lead
|
|
C601-4
|
|
Ground
|
Is any voltage present?
|
| B6
CHECK THE COMMON CIRCUIT FOR AN OPEN BETWEEN THE RH (RIGHT-HAND)
EXTERIOR MIRROR AND THE PDM (PASSENGER DOOR MODULE)
|
-
Measure:
|
Positive Lead
|
Measurement / Action
|
Negative Lead
|
|
C601-4
|
|
C652B-17
|
Is the resistance less than 3 ohms?
|
| B7
CHECK THE COMMON CIRCUIT FOR A SHORT TO GROUND AT THE RH (RIGHT-HAND)
EXTERIOR MIRROR
|
-
Measure:
|
Positive Lead
|
Measurement / Action
|
Negative Lead
|
|
C601-4
|
|
Ground
|
Is the resistance greater than 10,000 ohms?
|
| B8
CHECK FOR VOLTAGE TO THE HORIZONTAL MOTOR CIRCUIT AT THE RH (RIGHT-HAND)
EXTERIOR MIRROR
|
-
Disconnect
Exterior Mirror.
-
Connect:
|
Lead 1
|
Measurement / Action
|
Lead 2
|
|
C601-6
|
|
Ground
|
-
Select the
mirror on the exterior mirror selection switch.
-
Monitor the test light while pressing the exterior mirror control switch in the right direction.
Does the test light illuminate ONLY when the exterior mirror control switch is pressed in the right direction?
| No
|
If the test light is illuminated when the exterior mirror control switch is not pressed in any direction, GO to
B9
If the test light does not illuminate when the exterior mirror control switch is pressed in the right direction, GO to
B10
|
|
| B9
CHECK THE HORIZONTAL MIRROR CIRCUIT FOR A SHORT TO VOLTAGE AT THE RH (RIGHT-HAND)
EXTERIOR MIRROR
|
-
Measure:
|
Positive Lead
|
Measurement / Action
|
Negative Lead
|
|
C601-6
|
|
Ground
|
Is any voltage present?
|
| B10
CHECK THE HORIZONTAL MOTOR CIRCUIT FOR A SHORT TO GROUND AT THE RH (RIGHT-HAND)
EXTERIOR MIRROR
|
-
Measure:
|
Positive Lead
|
Measurement / Action
|
Negative Lead
|
|
C601-6
|
|
Ground
|
Is the resistance greater than 10,000 ohms?
|
| B11
CHECK THE HORIZONTAL MOTOR CIRCUIT FOR AN OPEN BETWEEN THE RH (RIGHT-HAND)
EXTERIOR MIRROR AND THE PDM (PASSENGER DOOR MODULE)
|
-
Measure:
|
Positive Lead
|
Measurement / Action
|
Negative Lead
|
|
C601-6
|
|
C652B-8
|
Is the resistance less than 3 ohms?
|
| B12
CHECK FOR VOLTAGE TO THE VERTICAL MOTOR CIRCUIT AT THE RH (RIGHT-HAND)
EXTERIOR MIRROR
|
-
Disconnect
Exterior Mirror.
-
Connect a test light between:
|
Lead 1
|
Measurement / Action
|
Lead 2
|
|
C601-3
|
|
Ground
|
-
Select the
mirror on the exterior mirror selection switch.
-
Monitor the test light while pressing the exterior mirror control switch in the up direction.
Does the test light illuminate ONLY when the exterior mirror control switch is pressed in the up direction?
| No
|
If the test light is illuminated when the exterior mirror control switch is not pressed in any direction, GO to
B13
If the test light does not illuminate when the exterior mirror control switch is pressed in the up direction, GO to
B14
|
|
| B13
CHECK THE VERTICAL MIRROR CIRCUIT FOR A SHORT TO VOLTAGE AT THE RH (RIGHT-HAND)
EXTERIOR MIRROR
|
-
Measure:
|
Positive Lead
|
Measurement / Action
|
Negative Lead
|
|
C601-3
|
|
Ground
|
Is any voltage present?
|
| B14
CHECK THE VERTICAL MOTOR CIRCUIT FOR A SHORT TO GROUND AT THE RH (RIGHT-HAND)
EXTERIOR MIRROR
|
-
Measure:
|
Positive Lead
|
Measurement / Action
|
Negative Lead
|
|
C601-3
|
|
Ground
|
Is the resistance greater than 10,000 ohms?
|
| B15
CHECK THE VERTICAL MOTOR CIRCUIT FOR AN OPEN BETWEEN THE RH (RIGHT-HAND)
EXTERIOR MIRROR AND THE PDM (PASSENGER DOOR MODULE)
|
-
Measure:
|
Positive Lead
|
Measurement / Action
|
Negative Lead
|
|
C601-3
|
|
C652B-7
|
Is the resistance less than 3 ohms?
|
| B16
CHECK FOR CORRECT PDM (PASSENGER DOOR MODULE)
OPERATION
|
-
Disconnect and inspect all
connectors.
-
Repair:
-
corrosion (install new connector or terminals - clean module pins)
-
damaged or bent pins - install new terminals/pins
-
pushed-out pins - install new pins as necessary
-
Reconnect the
connectors and all previously disconnected exterior mirror system connectors. Make sure all connectors seat and latch correctly.
-
Operate the system to determine if the concern is still present.
Is the concern still present?
| Yes
|
CHECK
for any applicable Technical Service Bulletins (TSBs). If a
exists for this concern, DISCONTINUE this test and FOLLOW the
instructions. If no Technical Service Bulletins (TSBs) address this concern, INSTALL a new
.
REFER to:
Passenger Door Module (PDM)
(419-10 Multifunction Electronic Modules, Removal and Installation).
|
| No
|
The system is operating correctly at this time. The concern may have been caused by module connections. ADDRESS the root cause
of any connector or pin issues.
|
|
| B17
CHECK THE EXTERIOR MIRROR JUMPER HARNESS
|
-
Inspect the exterior mirror jumper harness between the vehicle harness and the mirror motors for:
-
open or short circuits
-
damaged or pushed out pins
-
corrosion
Is the harness OK?
| Yes
|
INSTALL a new exterior mirror motor.
REFER to:
Exterior Mirror
(501-09 Rear View Mirrors, Removal and Installation).
|
| No
|
REPAIR the harness as necessary. If the harness cannot be repaired, INSTALL a new exterior mirror.
REFER to:
Exterior Mirror
(501-09 Rear View Mirrors, Removal and Installation).
|
|
The
Exterior Mirror Is Inoperative Or Does Not Operate Correctly In One Or More Direction(s) (Memory)
Refer to Wiring Diagrams Cell 124 for schematic and connector information.
Normal Operation and Fault Conditions
The
supplies voltage and ground to the
exterior mirror motors based on input provided by the exterior mirror control switch. To support the memory function, the
supplies a 5 volt reference and ground to the mirror motor potentiometers. The
monitors the feedback voltage from the horizontal and vertical potentiometers to determine the position of the
mirror glass. The
is capable of storing Diagnostic Trouble Codes (DTCs) for the
exterior mirror motor drive and mirror position feedback circuits when a concern exists.
Possible Sources
-
Wiring, terminals or connectors
-
Exterior mirror control switch
-
Exterior mirror motor
-
Exterior mirror
-
Visual Inspection and Diagnostic Pre-Checks
Inspect
fuse 25 (30A).
|
DTC
|
Description
|
Fault Trigger Conditions
|
|
B1C09:11
|
Driver Left/Right Mirror Motor: Circuit Short To Ground
|
This continuous and on-demand
sets if the
detects a higher than expected current draw when voltage is applied to the horizontal mirror motor circuit.
|
|
B1C09:15
|
Driver Left/Right Mirror Motor: Circuit Short To Battery Or Open
|
This continuous and on-demand
sets if the
detects a lower than expected current draw when voltage is applied to the horizontal mirror motor circuit.
|
|
B1C10:11
|
Driver Up/Down Mirror Motor: Circuit Short To Ground
|
This continuous and on-demand
sets if the
detects a higher than expected current draw when voltage is applied to the vertical motor circuit.
|
|
B1C10:15
|
Driver Up/Down Mirror Motor: Circuit Short To Battery Or Open
|
This continuous and on-demand
sets if the
detects a lower than expected current draw when voltage is applied to the vertical motor circuit.
|
|
B1C13:11
|
Driver Up/Down Mirror Motor Feedback: Circuit Short To Ground
|
This continuous and on-demand
sets if the
detects a short to ground on the vertical position feedback circuit.
|
|
B1C13:15
|
Driver Up/Down Mirror Motor Feedback: Circuit Short To Battery Or Open
|
This continuous and on-demand
sets if the
detects a short to voltage or open on the vertical position feedback circuit.
|
|
B1C14:11
|
Driver Left/Right Mirror Motor Feedback: Circuit Short To Ground
|
This continuous and on-demand
sets if the
detects a short to ground on the horizontal position feedback circuit.
|
|
B1C14:15
|
Driver Left/Right Mirror Motor Feedback: Circuit Short To Battery Or Open
|
This continuous and on-demand
sets if the
detects a short to voltage or open on the horizontal position feedback circuit.
|
|
C1B15:11
|
Sensor Supply Voltage B: Circuit Short To Ground
|
This continuous and on-demand
sets if the
detects a short to ground on the
exterior mirror position sensor voltage supply circuit.
|
|
C1B15:15
|
Sensor Supply Voltage B: Circuit Short To Battery or Open
|
This continuous and on-demand
sets if the
detects a short to voltage or open on the
exterior mirror position sensor voltage supply circuit.
|
PINPOINT TEST C : THE LH (LEFT-HAND)
EXTERIOR MIRROR IS INOPERATIVE OR DOES NOT OPERATE CORRECTLY IN ONE OR MORE DIRECTION(S) (MEMORY)
| C1
CHECK THE DDM (DRIVER DOOR MODULE)
DIAGNOSTIC TROUBLE CODES (DTCS)
|
-
Using a diagnostic scan tool, perform the
self-test.
Are any Diagnostic Trouble Codes (DTCs) present?
| Yes
|
For Diagnostic Trouble Codes (DTCs) B1C09:11 or B1C09:15, GO to
C15
For Diagnostic Trouble Codes (DTCs) B1C10:11 or B1C10:15, GO to
C19
For Diagnostic Trouble Codes (DTCs) B1C13:11, B1C13:15, B1C14:11, B1C14:15, C1B15:11, or C1B15:15, GO to
C8
For all other
Diagnostic Trouble Codes (DTCs),
REFER to:
Locks, Latches and Entry Systems
(501-14 Handles, Locks, Latches and Entry Systems, Diagnosis and Testing).
|
|
| C2
CHECK THE EXTERIOR MIRROR SELECTION SWITCH
|
-
Using a diagnostic scan tool, monitor the MIR_SEL
.
-
Operate the exterior mirror selection buttons to select the
and then
exterior mirrors.
Does the MIR_SEL
match the selector switch in both positions?
|
| C3
CHECK THE EXTERIOR MIRROR CONTROL SWITCH
|
-
Using a diagnostic scan tool, monitor the PM_POS_SW
.
-
Press the exterior mirror control switch in the left, right, up and down directions.
Does the PM_POS_SW
match the control switch in all directions?
|
| C4
CHECK THE LH (LEFT-HAND)
MIRROR COMMON CIRCUIT FOR VOLTAGE AT THE LH (LEFT-HAND)
EXTERIOR MIRROR
|
-
Disconnect
Exterior Mirror.
-
Connect a test light between:
|
Lead 1
|
Measurement / Action
|
Lead 2
|
|
C516-4
|
|
Ground
|
-
Select the
mirror on the exterior mirror selection switch.
-
Monitor the test light while pressing the exterior mirror control switch in the left and down directions.
Does the test light illuminate ONLY when the exterior mirror control switch is pressed in the left and down directions?
| No
|
If the test light is illuminated when the exterior mirror control switch is not pressed in any direction, GO to
C5
If the test light does not illuminate when the exterior mirror control switch is pressed in the left and down directions,
GO to
C6
|
|
| C5
CHECK THE COMMON CIRCUIT FOR A SHORT TO VOLTAGE AT THE LH (LEFT-HAND)
EXTERIOR MIRROR
|
-
Measure:
|
Positive Lead
|
Measurement / Action
|
Negative Lead
|
|
C516-4
|
|
Ground
|
Is any voltage present?
|
| C6
CHECK THE COMMON CIRCUIT FOR AN OPEN BETWEEN THE LH (LEFT-HAND)
EXTERIOR MIRROR AND THE DDM (DRIVER DOOR MODULE)
|
-
Measure:
|
Positive Lead
|
Measurement / Action
|
Negative Lead
|
|
C516-4
|
|
C501B-17
|
Is the resistance less than 3 ohms?
|
| C7
CHECK THE COMMON CIRCUIT FOR A SHORT TO GROUND AT THE LH (LEFT-HAND)
EXTERIOR MIRROR
|
-
Measure:
|
Positive Lead
|
Measurement / Action
|
Negative Lead
|
|
C516-4
|
|
Ground
|
Is the resistance greater than 10,000 ohms?
|
| C8
CHECK THE POSITION SENSOR CIRCUITS FOR A SHORT TO GROUND AT THE LH (LEFT-HAND)
EXTERIOR MIRROR
|
-
Disconnect
Exterior Mirror.
-
Measure:
|
Positive Lead
|
Measurement / Action
|
Negative Lead
|
|
C516-12
|
|
Ground
|
|
C516-13
|
|
Ground
|
|
C516-14
|
|
Ground
|
Are the resistances greater than 10,000 ohms?
| No
|
REPAIR the affected circuit.
|
|
| C9
CHECK THE POSITION SENSOR CIRCUITS FOR AN OPEN BETWEEN THE LH (LEFT-HAND)
EXTERIOR MIRROR AND THE DDM (DRIVER DOOR MODULE)
|
-
Measure:
|
Positive Lead
|
Measurement / Action
|
Negative Lead
|
|
C516-12
|
|
C501B-5
|
|
C516-13
|
|
C501B-6
|
|
C516-14
|
|
C501B-16
|
|
C516-15
|
|
C501B-15
|
Are the resistances less than 3 ohms?
| No
|
REPAIR the affected circuit.
|
|
| C10
CHECK THE POSITION SENSOR CIRCUITS FOR A SHORT TO VOLTAGE
|
-
Measure:
|
Positive Lead
|
Measurement / Action
|
Negative Lead
|
|
C516-12
|
|
Ground
|
|
C516-13
|
|
Ground
|
|
C516-14
|
|
Ground
|
|
C516-15
|
|
Ground
|
Is any voltage present?
| Yes
|
REPAIR the affected circuit.
|
|
| C11
CHECK THE MIRROR POSITION SENSOR REFERENCE VOLTAGE AT THE LH (LEFT-HAND)
EXTERIOR MIRROR
|
-
Measure:
|
Positive Lead
|
Measurement / Action
|
Negative Lead
|
|
C516-12
|
|
C516-15
|
Is the voltage approximately 5 volts?
|
| C12
CHECK THE DDM (DRIVER DOOR MODULE)
DIAGNOSTIC TROUBLE CODES (DTCS) WITH THE LH (LEFT-HAND)
EXTERIOR MIRROR DISCONNECTED
|
-
Using a diagnostic scan tool, clear the
Diagnostic Trouble Codes (DTCs).
Is
B1B13:11 or B1B14:11 present?
|
| C13
CHECK THE DDM (DRIVER DOOR MODULE)
DIAGNOSTIC TROUBLE CODES (DTCS) WITH THE HORIZONTAL POSITION SENSOR FEEDBACK CIRCUIT SHORTED TO GROUND
|
-
Connect:
|
Lead 1
|
Measurement / Action
|
Lead 2
|
|
C516-13
|

|
C516-15
|
-
Using a diagnostic scan tool, clear the
Diagnostic Trouble Codes (DTCs).
Is
B1C14:11 present?
| Yes
|
REMOVE the fused jumper wire.
GO to
C14
|
| No
|
REMOVE the fused jumper wire.
GO to
C23
|
|
| C14
CHECK THE DDM (DRIVER DOOR MODULE)
DIAGNOSTIC TROUBLE CODES (DTCS) WITH THE VERTICAL POSITION SENSOR FEEDBACK CIRCUIT SHORTED TO GROUND
|
-
Connect:
|
Lead 1
|
Measurement / Action
|
Lead 2
|
|
C516-14
|
|
C516-15
|
-
Using a diagnostic scan tool, clear the
Diagnostic Trouble Codes (DTCs).
Is
B1C13:11 present?
| Yes
|
REMOVE the fused jumper wire.
GO to
C15
|
| No
|
REMOVE the fused jumper wire.
GO to
C23
|
|
| C15
CHECK FOR VOLTAGE TO THE HORIZONTAL MOTOR CIRCUIT AT THE LH (LEFT-HAND)
EXTERIOR MIRROR
|
-
Disconnect
Exterior Mirror.
-
Connect a test light between:
|
Lead 1
|
Measurement / Action
|
Lead 2
|
|
C516-6
|
|
Ground
|
-
Select the
mirror on the exterior mirror selection switch.
-
Monitor the test light while pressing the exterior mirror control switch in the right direction.
Does the test light illuminate ONLY when the exterior mirror control switch is pressed in the right direction?
| No
|
If the test light is illuminated when the exterior mirror control switch is not pressed in any direction, GO to
C16
If the test light does not illuminate when the exterior mirror control switch is pressed in the right direction, GO to
C17
|
|
| C16
CHECK THE HORIZONTAL MIRROR CIRCUIT FOR A SHORT TO VOLTAGE AT THE LH (LEFT-HAND)
EXTERIOR MIRROR
|
-
Measure:
|
Positive Lead
|
Measurement / Action
|
Negative Lead
|
|
C516-6
|
|
Ground
|
Is any voltage present?
|
| C17
CHECK THE HORIZONTAL MOTOR CIRCUIT FOR A SHORT TO GROUND AT THE LH (LEFT-HAND)
EXTERIOR MIRROR
|
-
Measure:
|
Positive Lead
|
Measurement / Action
|
Negative Lead
|
|
C516-6
|
|
Ground
|
Is the resistance greater than 10,000 ohms?
|
| C18
CHECK THE HORIZONTAL MOTOR CIRCUIT FOR AN OPEN BETWEEN THE LH (LEFT-HAND)
EXTERIOR MIRROR AND THE DDM (DRIVER DOOR MODULE)
|
-
Measure:
|
Positive Lead
|
Measurement / Action
|
Negative Lead
|
|
C516-6
|
|
C501B-8
|
Is the resistance less than 3 ohms?
|
| C19
CHECK FOR VOLTAGE TO THE VERTICAL MOTOR CIRCUIT AT THE LH (LEFT-HAND)
EXTERIOR MIRROR
|
-
Disconnect
Exterior Mirror.
-
Connect:
|
Lead 1
|
Measurement / Action
|
Lead 2
|
|
C516-3
|
|
Ground
|
-
Select the
mirror on the exterior mirror selection switch.
-
Monitor the test light while pressing the exterior mirror control switch in the up direction.
Does the test light illuminate ONLY when the exterior mirror control switch is pressed in the up direction?
| No
|
If the test light is illuminated when the exterior mirror control switch is not pressed in any direction, GO to
C20
If the test light does not illuminate when the exterior mirror control switch is pressed in the up direction, GO to
C21
|
|
| C20
CHECK THE VERTICAL MIRROR CIRCUIT FOR A SHORT TO VOLTAGE AT THE LH (LEFT-HAND)
EXTERIOR MIRROR
|
-
Measure:
|
Positive Lead
|
Measurement / Action
|
Negative Lead
|
|
C516-3
|
|
Ground
|
Is any voltage present?
|
| C21
CHECK THE VERTICAL MOTOR CIRCUIT FOR A SHORT TO GROUND AT THE LH (LEFT-HAND)
EXTERIOR MIRROR
|
-
Measure the resistance between:
|
Positive Lead
|
Measurement / Action
|
Negative Lead
|
|
C516-3
|
|
Ground
|
Is the resistance greater than 10,000 ohms?
|
| C22
CHECK THE VERTICAL MOTOR CIRCUIT FOR AN OPEN BETWEEN THE LH (LEFT-HAND)
EXTERIOR MIRROR AND THE DDM (DRIVER DOOR MODULE)
|
-
Measure:
|
Positive Lead
|
Measurement / Action
|
Negative Lead
|
|
C516-3
|
|
C501B-7
|
Is the resistance less than 3 ohms?
|
| C23
CHECK FOR CORRECT DDM (DRIVER DOOR MODULE)
OPERATION
|
-
Disconnect and inspect all
connectors.
-
Repair:
-
corrosion (install new connector or terminals - clean module pins)
-
damaged or bent pins - install new terminals/pins
-
pushed-out pins - install new pins as necessary
-
Reconnect the
connectors and all previously disconnected exterior mirror system connectors. Make sure all connectors seat and latch correctly.
-
Operate the system to determine if the concern is still present.
Is the concern still present?
| Yes
|
CHECK
for any applicable Technical Service Bulletins (TSBs). If a
exists for this concern, DISCONTINUE this test and FOLLOW the
instructions. If no Technical Service Bulletins (TSBs) address this concern, INSTALL a new
.
REFER to:
Driver Door Module (DDM)
(419-10 Multifunction Electronic Modules, Removal and Installation).
|
| No
|
The system is operating correctly at this time. The concern may have been caused by module connections. ADDRESS the root cause
of any connector or pin issues.
|
|
| C24
CHECK THE EXTERIOR MIRROR JUMPER HARNESS
|
-
Inspect the exterior mirror jumper harness between the vehicle harness and the mirror motors for:
-
open or short circuits
-
damaged or pushed out pins
-
corrosion
Is the harness OK?
| Yes
|
INSTALL a new exterior mirror motor.
REFER to:
Exterior Mirror
(501-09 Rear View Mirrors, Removal and Installation).
|
| No
|
REPAIR the harness as necessary. If the harness cannot be repaired, INSTALL a new exterior mirror.
REFER to:
Exterior Mirror
(501-09 Rear View Mirrors, Removal and Installation).
|
|
The
Exterior Mirror Is Inoperative Or Does Not Operate Correctly In One Or More Direction(s) (Memory)
Refer to Wiring Diagrams Cell 124 for schematic and connector information.
Normal Operation and Fault Conditions
The
supplies voltage and ground to the
exterior mirror motors based on input provided by the exterior mirror control switch. To support the memory function, the
supplies a 5 volt reference and ground to the mirror motor potentiometers. The
monitors the feedback voltage from the horizontal and vertical potentiometers to determine the position of the
mirror glass. The
is capable of storing Diagnostic Trouble Codes (DTCs) for the
exterior mirror motor drive and mirror position feedback circuits when a problem exists.
Possible Sources
-
Wiring, terminals or connectors
-
Exterior mirror control switch
-
Exterior mirror motor
-
Exterior mirror
-
Visual Inspection and Diagnostic Pre-Checks
Inspect
fuse 26 (30A).
|
DTC
|
Description
|
Fault Trigger Conditions
|
|
B1C11:11
|
Passenger Left/Right Mirror Motor: Circuit Short To Ground
|
This continuous and on-demand DTC sets if the
detects a higher than expected current draw when voltage is applied to the horizontal mirror motor circuit.
|
|
B1C11:15
|
Passenger Left/Right Mirror Motor: Circuit Short To Battery Or Open
|
This continuous and on-demand DTC sets if the
detects a lower than expected current draw when voltage is applied to the horizontal mirror motor circuit.
|
|
B1C12:11
|
Passenger Up/Down Mirror Motor: Circuit Short To Ground
|
This continuous and on-demand DTC sets if the
detects a higher than expected current draw when voltage is applied to the vertical motor circuit.
|
|
B1C12:15
|
Passenger Up/Down Mirror Motor: Circuit Short To Battery Or Open
|
This continuous and on-demand DTC sets if the
detects a lower than expected current draw when voltage is applied to the vertical motor circuit.
|
|
B1C15:11
|
Passenger Up/Down Mirror Motor Feedback: Circuit Short To Ground
|
This continuous and on-demand DTC sets if the
detects a short to ground on the vertical position feedback circuit.
|
|
B1C15:15
|
Passenger Up/Down Mirror Motor Feedback: Circuit Short To Battery Or Open
|
This continuous and on-demand DTC sets if the
detects a short to voltage or open on the vertical position feedback circuit.
|
|
B1C16:11
|
Passenger Left/Right Mirror Motor Feedback: Circuit Short To Ground
|
This continuous and on-demand DTC sets if the
detects a short to ground on the horizontal position feedback circuit.
|
|
B1C16:15
|
Passenger Left/Right Mirror Motor Feedback: Circuit Short To Battery Or Open
|
This continuous and on-demand DTC sets if the
detects a short to voltage or open on the horizontal position feedback circuit.
|
|
C1B15:11
|
Sensor Supply Voltage B: Circuit Short To Ground
|
This continuous and on-demand
sets if the
detects a short to ground on the
exterior mirror position sensor voltage supply circuit.
|
|
C1B15:15
|
Sensor Supply Voltage B: Circuit Short To Battery or Open
|
This continuous and on-demand
sets if the
detects a short to voltage or open on the
exterior mirror position sensor voltage supply circuit.
|
PINPOINT TEST D : THE RH (RIGHT-HAND)
EXTERIOR MIRROR IS INOPERATIVE OR DOES NOT OPERATE IN ONE OR MORE DIRECTION(S) (MEMORY)
| D1
CHECK THE PDM (PASSENGER DOOR MODULE)
DIAGNOSTIC TROUBLE CODES (DTCS)
|
-
Using a diagnostic scan tool, perform the
self-test.
Are any DTCs present?
| Yes
|
For DTCs B1C11:11 or B1C11:15, GO to
D15
For DTCs B1C12:11 or B1C12:15, GO to
D19
For DTCs B1C15:11, B1C15:15, B1C16:11, B1C16:15, C1B15:11, or C1B15:15, GO to
D8
For all other
Diagnostic Trouble Codes (DTCs), REFER to the
chart in this section.
|
|
| D2
CHECK THE EXTERIOR MIRROR SELECTION SWITCH
|
-
Using a diagnostic scan tool, monitor the MIR_SEL
.
-
Operate the exterior mirror selection buttons to select the
and then
exterior mirrors.
Does the MIR_SEL
match the selector switch in both positions?
|
| D3
CHECK THE EXTERIOR MIRROR CONTROL SWITCH
|
-
Using a diagnostic scan tool, monitor the PM_POS_SW
.
-
Press the exterior mirror control switch in the left, right, up and down directions.
Does the PM_POS_SW
match the control switch in all directions?
|
| D4
CHECK THE RH (RIGHT-HAND)
MIRROR COMMON CIRCUIT FOR VOLTAGE AT THE RH (RIGHT-HAND)
EXTERIOR MIRROR
|
-
Disconnect
Exterior Mirror.
-
Connect:
|
Lead 1
|
Measurement / Action
|
Lead 2
|
|
C601-4
|
|
Ground
|
-
Select the
mirror on the exterior mirror selection switch.
-
While pressing the exterior mirror control switch in the left and down directions, monitor the test light.
Does the test light illuminate ONLY when the exterior mirror control switch is pressed in the left and down directions?
| No
|
If the test light is illuminated when the exterior mirror control switch is not pressed in any direction, GO to
D5
If the test light does not illuminate when the exterior mirror control switch is pressed in the left and down directions,
GO to
D6
|
|
| D5
CHECK THE COMMON CIRCUIT FOR A SHORT TO VOLTAGE AT THE RH (RIGHT-HAND)
EXTERIOR MIRROR
|
-
Measure:
|
Positive Lead
|
Measurement / Action
|
Negative Lead
|
|
C601-4
|
|
Ground
|
Is any voltage present?
|
| D6
CHECK THE COMMON CIRCUIT FOR AN OPEN BETWEEN THE RH (RIGHT-HAND)
EXTERIOR MIRROR AND THE PDM (PASSENGER DOOR MODULE)
|
-
Measure:
|
Positive Lead
|
Measurement / Action
|
Negative Lead
|
|
C601-4
|
|
C652B-17
|
Is the resistance less than 3 ohms?
|
| D7
CHECK THE COMMON CIRCUIT FOR A SHORT TO GROUND AT THE RH (RIGHT-HAND)
EXTERIOR MIRROR
|
-
Measure:
|
Positive Lead
|
Measurement / Action
|
Negative Lead
|
|
C601-4
|
|
Ground
|
Is the resistance greater than 10,000 ohms?
|
| D8
CHECK THE MIRROR MOTOR FEEDBACK CIRCUITS FOR A SHORT TO GROUND AT THE RH (RIGHT-HAND)
EXTERIOR MIRROR
|
-
Disconnect
Exterior Mirror.
-
Measure:
|
Positive Lead
|
Measurement / Action
|
Negative Lead
|
|
C601-12
|
|
Ground
|
|
C601-13
|
|
Ground
|
|
C601-14
|
|
Ground
|
Are the resistances greater than 10,000 ohms?
| No
|
REPAIR the affected circuit.
|
|
| D9
CHECK THE MIRROR MOTOR FEEDBACK CIRCUITS FOR AN OPEN BETWEEN THE RH (RIGHT-HAND)
EXTERIOR MIRROR AND THE PDM (PASSENGER DOOR MODULE)
|
-
Measure:
|
Positive Lead
|
Measurement / Action
|
Negative Lead
|
|
C601-12
|
|
C652B-5
|
|
C601-13
|
|
C652B-6
|
|
C601-14
|
|
C652B-16
|
|
C601-15
|
|
C652B-15
|
Are the resistances less than 3 ohms?
| No
|
REPAIR the affected circuit.
|
|
| D10
CHECK THE MIRROR MOTOR FEEDBACK CIRCUITS FOR A SHORT TO VOLTAGE
|
-
Measure:
|
Positive Lead
|
Measurement / Action
|
Negative Lead
|
|
C601-12
|
|
Ground
|
|
C601-13
|
|
Ground
|
|
C601-14
|
|
Ground
|
|
C601-15
|
|
Ground
|
Is any voltage present?
| Yes
|
REPAIR the affected circuit.
|
|
| D11
CHECK THE MIRROR MOTOR FEEDBACK REFERENCE VOLTAGE AT THE RIGHT HAND (RH) EXTERIOR MIRROR
|
-
Measure:
|
Positive Lead
|
Measurement / Action
|
Negative Lead
|
|
C601-12
|
|
Ground
|
Is the voltage approximately 5 volts?
|
| D12
CHECK THE PDM (PASSENGER DOOR MODULE)
DIAGNOSTIC TROUBLE CODES (DTCS) WITH THE RH (RIGHT-HAND)
EXTERIOR MIRROR DISCONNECTED
|
-
Using a diagnostic scan tool, clear the
Diagnostic Trouble Codes (DTCs).
Is
B1B15:11 or B1B16:11 present?
|
| D13
CHECK THE PDM (PASSENGER DOOR MODULE)
DIAGNOSTIC TROUBLE CODES (DTCS) WITH THE HORIZONTAL POSITION SENSOR FEEDBACK CIRCUIT SHORTED TO GROUND
|
-
Connect:
|
Lead 1
|
Measurement / Action
|
Lead 2
|
|
C601-13
|
|
C601-15
|
-
Using a diagnostic scan tool, clear the
Diagnostic Trouble Codes (DTCs).
Is
B1C16:11 present?
| Yes
|
REMOVE the fused jumper wire.
GO to
D14
|
| No
|
REMOVE the fused jumper wire.
GO to
D23
|
|
| D14
CHECK THE PDM (PASSENGER DOOR MODULE)
DIAGNOSTIC TROUBLE CODES (DTCS) WITH THE VERTICAL POSITION SENSOR FEEDBACK CIRCUIT SHORTED TO GROUND
|
-
Connect:
|
Lead 1
|
Measurement / Action
|
Lead 2
|
|
C601-14
|
|
C601-15
|
-
Using a diagnostic scan tool, clear the
Diagnostic Trouble Codes (DTCs).
Is
B1C15:11 present?
| Yes
|
REMOVE the fused jumper wire.
GO to
D15
|
| No
|
REMOVE the fused jumper wire.
GO to
D23
|
|
| D15
CHECK FOR VOLTAGE TO THE HORIZONTAL MOTOR CIRCUIT AT THE RH (RIGHT-HAND)
EXTERIOR MIRROR
|
-
Disconnect
Exterior Mirror.
-
Connect:
|
Lead 1
|
Measurement / Action
|
Lead 2
|
|
C601-6
|
|
Ground
|
-
Select the
mirror on the exterior mirror selection switch.
-
While pressing the exterior mirror control switch in the right direction, monitor the test light.
Does the test light illuminate ONLY when the exterior mirror control switch is pressed in the right direction?
| No
|
If the test light is illuminated when the exterior mirror control switch is not pressed in any direction, GO to
D16
If the test light does not illuminate when the exterior mirror control switch is pressed in the right direction, GO to
D17
|
|
| D16
CHECK THE HORIZONTAL MIRROR CIRCUIT FOR A SHORT TO VOLTAGE AT THE RH (RIGHT-HAND)
EXTERIOR MIRROR
|
-
Measure:
|
Positive Lead
|
Measurement / Action
|
Negative Lead
|
|
C601-6
|
|
Ground
|
Is any voltage present?
|
| D17
CHECK THE HORIZONTAL MOTOR CIRCUIT FOR A SHORT TO GROUND AT THE RH (RIGHT-HAND)
EXTERIOR MIRROR
|
-
Measure:
|
Positive Lead
|
Measurement / Action
|
Negative Lead
|
|
C601-6
|
|
Ground
|
Is the resistance greater than 10,000 ohms?
|
| D18
CHECK THE HORIZONTAL MOTOR CIRCUIT FOR AN OPEN BETWEEN THE RH (RIGHT-HAND)
EXTERIOR MIRROR AND THE PDM (PASSENGER DOOR MODULE)
|
-
Measure:
|
Positive Lead
|
Measurement / Action
|
Negative Lead
|
|
C601-6
|
|
C652B-8
|
Is the resistance less than 3 ohms?
|
| D19
CHECK FOR VOLTAGE TO THE VERTICAL MOTOR CIRCUIT AT THE RH (RIGHT-HAND)
EXTERIOR MIRROR
|
-
Disconnect
Exterior Mirror.
-
Connect:
|
Lead 1
|
Measurement / Action
|
Lead 2
|
|
C601-3
|
|
Ground
|
-
Select the
mirror on the exterior mirror selection switch.
-
While pressing the exterior mirror control switch in the up direction, monitor the test light.
Does the test light illuminate ONLY when the exterior mirror control switch is pressed in the up direction?
| No
|
If the test light is illuminated when the exterior mirror control switch is not pressed in any direction, GO to
D20
If the test light does not illuminate when the exterior mirror control switch is pressed in the up direction, GO to
D21
|
|
| D20
CHECK THE VERTICAL MIRROR CIRCUIT FOR A SHORT TO VOLTAGE AT THE RH (RIGHT-HAND)
EXTERIOR MIRROR
|
-
Measure:
|
Positive Lead
|
Measurement / Action
|
Negative Lead
|
|
C601-3
|
|
Ground
|
Is any voltage present?
|
| D21
CHECK THE VERTICAL MOTOR CIRCUIT FOR A SHORT TO GROUND AT THE RH (RIGHT-HAND)
EXTERIOR MIRROR
|
-
Measure:
|
Positive Lead
|
Measurement / Action
|
Negative Lead
|
|
C601-3
|
|
Ground
|
Is the resistance greater than 10,000 ohms?
|
| D22
CHECK THE VERTICAL MOTOR CIRCUIT FOR AN OPEN BETWEEN THE RH (RIGHT-HAND)
EXTERIOR MIRROR AND THE PDM (PASSENGER DOOR MODULE)
|
-
Measure the resistance between:
|
Positive Lead
|
Measurement / Action
|
Negative Lead
|
|
C601-3
|
|
C652B-7
|
Is the resistance less than 3 ohms?
|
| D23
CHECK FOR CORRECT PDM (PASSENGER DOOR MODULE)
OPERATION
|
-
Disconnect and inspect all
connectors.
-
Repair:
-
corrosion (install new connector or terminals - clean module pins)
-
damaged or bent pins - install new terminals/pins
-
pushed-out pins - install new pins as necessary
-
Reconnect the
connectors and all previously disconnected exterior mirror system connectors. Make sure all connectors seat and latch correctly.
-
Operate the system to determine if the concern is still present.
Is the concern still present?
| Yes
|
CHECK
for any applicable Technical Service Bulletins (TSBs). If a
exists for this concern, DISCONTINUE this test and FOLLOW the
instructions. If no Technical Service Bulletins (TSBs) address this concern, INSTALL a new
.
REFER to:
Passenger Door Module (PDM)
(419-10 Multifunction Electronic Modules, Removal and Installation).
|
| No
|
The system is operating correctly at this time. The concern may have been caused by module connections. ADDRESS the root cause
of any connector or pin issues.
|
|
| D24
CHECK THE EXTERIOR MIRROR JUMPER HARNESS
|
-
Inspect the exterior mirror jumper harness between the vehicle harness and the mirror motors for:
-
open or short circuits
-
damaged or pushed out pins
-
corrosion
Is the harness OK?
| Yes
|
INSTALL a new exterior mirror motor.
REFER to:
Exterior Mirror
(501-09 Rear View Mirrors, Removal and Installation).
|
| No
|
REPAIR the harness as necessary. If the harness cannot be repaired, INSTALL a new exterior mirror.
REFER to:
Exterior Mirror
(501-09 Rear View Mirrors, Removal and Installation).
|
|
One Or Both Heated Exterior Mirrors Is Inoperative Or Always On
Refer to Wiring Diagrams Cell 124 for schematic and connector information.
Normal Operation and Fault Conditions
The
supplies voltage and ground to the
exterior mirror heater circuits and the
supplies voltage and ground to the
exterior mirror heater circuits when the exterior mirror heaters are commanded on by the
.
Possible Sources
-
Wiring, terminals or connectors
-
Exterior mirror glass
-
Exterior mirror
-
Door module
|
DTC
|
Description
|
Fault Trigger Conditions
|
|
B1163:11
|
Left Mirror Heater Output: Circuit Short To Ground
|
This continuous and on-demand DTC sets if the
detects a higher than expected current draw when voltage is applied to the
exterior mirror heater circuit.
|
|
B1163:15
|
Left Mirror Heater Output: Circuit Short To Battery Or Open
|
This continuous and on-demand DTC sets if the
detects a lower than expected current draw when voltage is applied to the
exterior mirror heater circuit.
|
|
B1164:11
|
Right Mirror Heater Output: Circuit Short To Ground
|
This continuous and on-demand DTC sets if the
detects a higher than expected current draw when voltage is applied to the
exterior mirror heater circuit.
|
|
B1C10:15
|
Right Mirror Heater Output: Circuit Short To Battery Or Open
|
This continuous and on-demand DTC sets if the
detects a lower than expected current draw when voltage is applied to the
exterior mirror heater circuit.
|
PINPOINT TEST E : ONE OR BOTH HEATED EXTERIOR MIRRORS IS INOPERATIVE OR ALWAYS ON
| E1
CHECK THE DDM (DRIVER DOOR MODULE)
OR PDM (PASSENGER DOOR MODULE)
DIAGNOSTIC TROUBLE CODES (DTCS)
|
-
Using a diagnostic scan tool, perform the
(
heated exterior mirror inoperative) or
(
heated exterior mirror is inoperative) self-test.
Are any Diagnostic Trouble Codes (DTCs) present?
| Yes
|
For
DTC B1163:11 or
DTC B1164:11, GO to
E7
For
DTC B1163:15 or
DTC B1164:15, GO to
E3
For all other
or
Diagnostic Trouble Codes (DTCs),
REFER to:
Locks, Latches and Entry Systems
(501-14 Handles, Locks, Latches and Entry Systems, Diagnosis and Testing).
|
|
| E2
VERIFY THE OPERATION OF THE REAR WINDOW DEFROST SYSTEM
|
-
With the engine running, activate the rear window defrost.
-
Using an infrared temperature gun or equivalent, measure the temperature of the rear window for approximately 30 seconds,
noting changes in temperature.
Did the temperature of the rear window glass rise?
| No
|
DIAGNOSE the rear window defrost system prior to continuing diagnostics for the heated exterior mirrors.
REFER to:
Glass, Frames and Mechanisms
(501-11 Glass, Frames and Mechanisms, Diagnosis and Testing).
|
|
| E3
CHECK THE EXTERIOR MIRROR HEATER OUTPUT VOLTAGE AT THE INOPERATIVE EXTERIOR MIRROR
|
-
Disconnect inoperative exterior mirror.
-
Connect a test light between:
Exterior Mirror
|
Lead 1
|
Measurement / Action
|
Lead 2
|
|
C516-1
|
|
C516-8
|
Exterior Mirror
|
Lead 1
|
Measurement / Action
|
Lead 2
|
|
C601-1
|
|
C601-8
|
-
With the engine running, activate the rear window defrost.
Does the test light illuminate only when the rear window defrost is activated?
| No
|
If the test light is illuminated at all times, GO to
E4
If the test light does not illuminate, GO to
E5
|
|
| E4
CHECK THE HEATER CIRCUIT FOR A SHORT TO VOLTAGE AT THE EXTERIOR MIRROR
|
-
Disconnect
C501B or
C652B
.
-
Measure:
Exterior Mirror
|
Positive Lead
|
Measurement / Action
|
Negative Lead
|
|
C516-1
|
|
Ground
|
Exterior Mirror
|
Positive Lead
|
Measurement / Action
|
Negative Lead
|
|
C601-1
|
|
Ground
|
Is any voltage present?
| No
|
For the
mirror, GO to
E10
For the
mirror, GO to
E9
|
|
| E5
CHECK FOR VOLTAGE TO THE HEATER CIRCUIT AT THE EXTERIOR MIRROR
|
-
Turn the rear window defrost off.
-
Connect a test light between:
Exterior Mirror
|
Lead 1
|
Measurement / Action
|
Lead 2
|
|
C516-1
|
|
Ground
|
Exterior Mirror
|
Lead 1
|
Measurement / Action
|
Lead 2
|
|
C601-1
|
|
Ground
|
-
With the engine running, activate the rear window defrost.
Does the test light illuminate?
| Yes
|
For the
exterior mirror, REPAIR circuit GD382.
For the
exterior mirror, REPAIR circuit GD383.
|
|
| E6
CHECK FOR AN OPEN IN THE HEATER CIRCUIT BETWEEN THE MIRROR AND THE DOOR MODULE
|
-
Disconnect
C501B or
C652B
.
-
Measure:
Exterior Mirror
|
Positive Lead
|
Measurement / Action
|
Negative Lead
|
|
C516-1
|
|
C501B-20
|
Exterior Mirror
|
Positive Lead
|
Measurement / Action
|
Negative Lead
|
|
C601-1
|
|
C652B-20
|
Is the resistance less than 3 ohms?
| Yes
|
For the
mirror, GO to
E10
For the
mirror, GO to
E9
|
| No
|
REPAIR the affected circuit.
|
|
| E7
CHECK THE HEATER CIRCUIT FOR A SHORT TO GROUND AT THE EXTERIOR MIRROR
|
-
Disconnect
C501B or
C652B
.
-
Disconnect inoperative exterior mirror.
-
Measure:
Exterior Mirror
|
Positive Lead
|
Measurement / Action
|
Negative Lead
|
|
C516-1
|
|
Ground
|
Exterior Mirror
|
Positive Lead
|
Measurement / Action
|
Negative Lead
|
|
C601-1
|
|
Ground
|
Is the resistance greater than 10,000 ohms?
|
| E8
CHECK THE DOOR MODULE DIAGNOSTIC TROUBLE CODES (DTCS) WITH THE EXTERIOR MIRROR DISCONNECTED
|
-
Using a scan tool, clear the
or
Diagnostic Trouble Codes (DTCs).
Is
B1163:15 or
B1164:15 present?
| No
|
For the
exterior mirror, GO to
E10
For the
exterior mirror, GO to
E9
|
|
| E9
CHECK FOR CORRECT PDM (PASSENGER DOOR MODULE)
OPERATION
|
-
Disconnect and inspect all
connectors.
-
Repair:
-
corrosion (install new connector or terminals - clean module pins)
-
damaged or bent pins - install new terminals/pins
-
pushed-out pins - install new pins as necessary
-
Reconnect the
connectors and all previously disconnected exterior mirror system connectors. Make sure all connectors seat and latch correctly.
-
Operate the system to determine if the concern is still present.
Is the concern still present?
| Yes
|
CHECK
for any applicable Technical Service Bulletins (TSBs). If a
exists for this concern, DISCONTINUE this test and FOLLOW the
instructions. If no Technical Service Bulletins (TSBs) address this concern, INSTALL a new
.
REFER to:
Passenger Door Module (PDM)
(419-10 Multifunction Electronic Modules, Removal and Installation).
|
| No
|
The system is operating correctly at this time. The concern may have been caused by module connections. ADDRESS the root cause
of any connector or pin issues.
|
|
| E10
CHECK FOR CORRECT DDM (DRIVER DOOR MODULE)
OPERATION
|
-
Disconnect and inspect all
connectors.
-
Repair:
-
corrosion (install new connector or terminals - clean module pins)
-
damaged or bent pins - install new terminals/pins
-
pushed-out pins - install new pins as necessary
-
Reconnect the
connectors and all previously disconnected exterior mirror system connectors. Make sure all connectors seat and latch correctly.
-
Operate the system to determine if the concern is still present.
Is the concern still present?
| Yes
|
CHECK
for any applicable Technical Service Bulletins (TSBs). If a
exists for this concern, DISCONTINUE this test and FOLLOW the
instructions. If no Technical Service Bulletins (TSBs) address this concern, INSTALL a new
.
REFER to:
Driver Door Module (DDM)
(419-10 Multifunction Electronic Modules, Removal and Installation).
|
| No
|
The system is operating correctly at this time. The concern may have been caused by module connections. ADDRESS the root cause
of any connector or pin issues.
|
|
| E11
CHECK THE EXTERIOR MIRROR JUMPER HARNESS
|
-
Inspect the exterior mirror jumper harness between the vehicle harness and the mirror motors for:
-
open or short circuits
-
damaged or pushed out pins
-
corrosion
Is the harness OK?
| Yes
|
INSTALL a new
exterior mirror glass. REFER to
REFER to:
Exterior Mirror
(501-09 Rear View Mirrors, Removal and Installation).
|
| No
|
REPAIR the harness as necessary. If the harness cannot be repaired, INSTALL a new exterior mirror.
REFER to:
Exterior Mirror
(501-09 Rear View Mirrors, Removal and Installation).
|
|
The
Exterior Auto-Dimming Mirror Is Inoperative Or Always In A Darkened State
Refer to Wiring Diagrams Cell 124 for schematic and connector information.
Normal Operation and Fault Conditions
The interior auto-dimming mirror supplies voltage and ground to the
exterior auto-dimming mirror glass.
Possible Sources
-
Wiring, terminals or connectors
-
Exterior mirror glass
-
Exterior mirror
-
Interior auto-dimming mirror concern
|
DTC
|
Description
|
Fault Trigger Conditions
|
|
B1286:14
|
Interior Mirror: Circuit Short To Ground or Open
|
This
sets in continuous memory when the
detects a short to ground on the
exterior auto-dimming mirror output circuit.
|
PINPOINT TEST F : THE LH (LEFT-HAND)
EXTERIOR AUTO-DIMMING MIRROR IS INOPERATIVE OR ALWAYS IN A DARKENED STATE
| F1
VERIFY THE OPERATION OF THE INTERIOR AUTO-DIMMING MIRROR - DAYLIGHT CONDITIONS
|
-
NOTE:
Base electrochromatic mirror shown.
mirror is similar.
Use a bright lamp to illuminate the forward facing sensor and the rearward facing sensor. The mirror should adjust to a high
reflectance state (mirror will be clear).
Did the interior auto-dimming mirror adjust to a high reflectance (clear) state?
|
| F2
VERIFY THE OPERATION OF THE INTERIOR AUTO-DIMMING MIRROR - NIGHTTIME CONDITIONS
|
-
NOTE:
Covering the sensor(s) with a finger or hand is not adequate for this step.
Cover the forward and rearward facing sensors with black electrical tape or other dark material. The mirror should adjust
to a high reflectance state (mirror will be clear).
Did the interior auto-dimming mirror adjust to a high reflectance (clear) state?
|
| F3
VERIFY THE OPERATION OF THE INTERIOR AUTO-DIMMING MIRROR - NIGHTTIME CONDITIONS WITH GLARE
|
-
NOTE:
Covering the sensor(s) with a finger or hand is not adequate for this step.
Remove the black electrical tape or other dark material from the rearward facing sensor.
-
Use a bright light to illuminate the rearward facing sensor. The mirror should adjust to a lower reflectance state (mirror
will be dark).
Did the interior auto-dimming mirror adjust to a low reflectance (dark) state?
|
| F4
VERIFY THE OPERATION OF THE INTERIOR AUTO-DIMMING MIRROR - VEHICLE IN REVERSE AND NIGHTTIME CONDITIONS WITH GLARE
|
-
NOTE:
Covering the sensor(s) with a finger or hand is not adequate for this step.
Continue to illuminate the rearward facing sensor with the forward facing sensor covered.
Did the interior auto-dimming mirror adjust to a high reflectance (clear) state after reverse was selected?
| Yes
|
If the
exterior auto-dimming mirror is inoperative, GO to
F5
If the
exterior auto-dimming mirror is always in a low reflectance (dark) state, GO to
F8
|
|
| F5
CHECK FOR VOLTAGE TO THE LH (LEFT-HAND)
EXTERIOR AUTO-DIMMING MIRROR WHILE SIMULATING NIGHTTIME CONDITIONS WITH GLARE
|
-
Disconnect
Exterior Mirror.
-
NOTE:
Covering the sensor(s) with a finger or hand is not adequate for this step.
Illuminate the rearward facing sensor with the forward facing sensor covered.
-
Measure:
|
Positive Lead
|
Measurement / Action
|
Negative Lead
|
|
C516-9
|
|
C516-2
|
Is any voltage present?
|
| F6
CHECK FOR AN OPEN BETWEEN THE LH (LEFT-HAND)
EXTERIOR MIRROR AND THE INTERIOR AUTO-DIMMING MIRROR
|
-
Disconnect Interior Auto-Dimming Mirror C911 (without
) or C9012 (with
).
Are the resistances less than 3 ohms?
| No
|
REPAIR the affected circuit.
|
|
| F7
CHECK THE LH (LEFT-HAND)
EXTERIOR AUTO-DIMMING MIRROR CIRCUITS FOR A SHORT TOGETHER
|
-
Measure:
|
Positive Lead
|
Measurement / Action
|
Negative Lead
|
|
C516-9
|
|
C516-2
|
Is the resistance greater than 10,000 ohms?
| No
|
REPAIR the affected circuit.
|
|
| F8
CHECK THE LH (LEFT-HAND)
EXTERIOR AUTO-DIMMING MIRROR CIRCUITS FOR VOLTAGE WHILE SIMULATING DAYTIME CONDITIONS
|
-
Disconnect
Exterior Mirror.
-
Use a bright lamp to illuminate the forward facing sensor and the rearward facing sensor. The mirror should adjust to a high
reflectance state (mirror will be clear).
-
Measure:
|
Positive Lead
|
Measurement / Action
|
Negative Lead
|
|
C516-9
|
|
C516-2
|
Is any voltage present?
|
| F9
CHECK THE LH (LEFT-HAND)
EXTERIOR AUTO-DIMMING MIRROR CIRCUITS FOR A SHORT TO VOLTAGE WITH THE INTERIOR AUTO DIMMING MIRROR DISCONNECTED
|
-
Disconnect Interior Auto-Dimming Mirror C911 (without
) or C9012 (with
).
-
Measure:
|
Positive Lead
|
Measurement / Action
|
Negative Lead
|
|
C516-9
|
|
Ground
|
|
C516-2
|
|
Ground
|
Is any voltage present?
| Yes
|
REPAIR the affected circuit.
|
| No
|
If the vehicle is equipped with an
, GO to
F10
If the vehicle is not equipped with an
, INSTALL a new interior auto-dimming mirror. REFER to
REFER to:
Interior Rear View Mirror
(501-09 Rear View Mirrors, Removal and Installation).
|
|
| F10
CHECK FOR CORRECT IPMA (IMAGE PROCESSING MODULE A)
OPERATION
|
-
Disconnect and inspect all
connectors.
-
Repair:
-
corrosion (install new connector or terminals - clean module pins)
-
damaged or bent pins - install new terminals/pins
-
pushed-out pins - install new pins as necessary
-
Reconnect the
and all previously disconnected exterior mirror system connectors. Make sure all connectors seat and latch correctly.
-
Operate the system to determine if the concern is still present.
Is the concern still present?
| Yes
|
CHECK
for any applicable Technical Service Bulletins (TSBs). If a
exists for this concern, DISCONTINUE this test and FOLLOW the
instructions. If no Technical Service Bulletins (TSBs) address this concern, INSTALL a new
. REFER to
REFER to:
Interior Rear View Mirror
(501-09 Rear View Mirrors, Removal and Installation).
|
| No
|
The system is operating correctly at this time. The concern may have been caused by module connections. ADDRESS the root cause
of any connector or pin issues.
|
|
| F11
CHECK THE EXTERIOR MIRROR JUMPER HARNESS
|
-
Inspect the exterior mirror jumper harness between the vehicle harness and the mirror motors for:
-
open or short circuits
-
damaged or pushed out pins
-
corrosion
Is the harness OK?
| Yes
|
INSTALL a new
exterior mirror glass.
REFER to:
Exterior Mirror
(501-09 Rear View Mirrors, Removal and Installation).
|
| No
|
REPAIR the harness as necessary. If the harness cannot be repaired, INSTALL a new exterior mirror.
REFER to:
Exterior Mirror
(501-09 Rear View Mirrors, Removal and Installation).
|
|
The Interior Auto-Dimming Mirror Is Inoperative Or Always In A Darkened State
Refer to Wiring Diagrams Cell 124 for schematic and connector information.
Normal Operation and Fault Conditions
REFER to:
Rear View Mirrors - System Operation and Component Description
(501-09 Rear View Mirrors, Description and Operation).
Possible Sources
-
Wiring, terminals or connectors
-
Reverse lamp concern
-
Interior auto-dimming mirror
PINPOINT TEST G : THE INTERIOR AUTO-DIMMING MIRROR DOES NOT OPERATE CORRECTLY
| G1
VERIFY THE OPERATION OF THE REVERSE LAMPS
|
-
NOTE:
If the
sensor is malfunctioning and the reverse lamps are inoperative or always on, the interior auto-dimming mirror will not function
properly.
Move the selector lever through the entire range while monitoring the reverse lamps.
Do the reverse lamps illuminate ONLY in REVERSE?
| No
|
DIAGNOSE the reverse lamps.
REFER to:
Reversing Lamps
(417-01 Exterior Lighting, Diagnosis and Testing).
|
|
| G2
INSPECT THE MIRROR FOR PROPER INSTALLATION
|
-
Inspect the interior auto-dimming mirror to make sure the rearward facing sensor is at the top of the mirror glass.
Is the rearward facing sensor at the
top
of the interior auto-dimming mirror glass?
| No
|
INSTALL the interior auto-dimming mirror with the rearward facing sensor at the top of the mirror glass.
REFER to:
Interior Rear View Mirror
(501-09 Rear View Mirrors, Removal and Installation).
|
|
| G3
VERIFY THE FORWARD AND REARWARD FACING SENSORS ARE NOT BLOCKED
|
-
Visually verify the forward and reward facing sensors are not blocked or obstructed. Sources of obstruction can include:
-
Stickers, window decals or tags.
-
Fold-down screens for TVs or DVD players.
-
Non-OEM window tinting.
-
Dirt and debris.
Are either of the sensors blocked?
| Yes
|
If possible, REMOVE the obstruction. If it is not possible to remove the obstruction, ADVISE the customer the blockage will
affect the operation of the auto-dimming mirror.
|
|
| G4
VERIFY THE OPERATION OF THE INTERIOR AUTO-DIMMING MIRROR - DAYLIGHT CONDITIONS
|
-
NOTE:
Base electrochromatic mirror shown.
mirror is similar.
Use a bright lamp to illuminate the forward facing sensor and the rearward facing sensor. The mirror should adjust to a high
reflectance state (mirror will be clear).
Did the mirror adjust to a high reflectance (clear) state?
| No
|
INSTALL a new interior auto-dimming mirror.
REFER to:
Interior Rear View Mirror
(501-09 Rear View Mirrors, Removal and Installation).
|
|
| G5
VERIFY THE OPERATION OF THE INTERIOR AUTO-DIMMING MIRROR - NIGHTTIME CONDITIONS
|
-
NOTE:
Covering the sensor(s) with a finger or hand is not adequate for this step.
Cover the forward and rearward facing sensors with black electrical tape or other dark material. The mirror should adjust
to a high reflectance state (mirror will be clear).
Did the mirror adjust to a high reflectance (clear) state?
| No
|
INSTALL a new interior auto-dimming mirror.
REFER to:
Interior Rear View Mirror
(501-09 Rear View Mirrors, Removal and Installation).
|
|
| G6
VERIFY THE OPERATION OF THE INTERIOR AUTO-DIMMING MIRROR - NIGHTTIME CONDITIONS WITH GLARE
|
-
NOTE:
Covering the sensor(s) with a finger or hand is not adequate for this step.
Remove the black electrical tape or other dark material from the rearward facing sensor.
-
Use a bright light to illuminate the rearward facing sensor. The mirror should adjust to a lower reflectance state (mirror
will be dark).
Did the mirror adjust to a low reflectance (dark) state?
| No
|
INSTALL a new interior auto-dimming mirror.
REFER to:
Interior Rear View Mirror
(501-09 Rear View Mirrors, Removal and Installation).
|
|
| G7
VERIFY THE OPERATION OF THE INTERIOR AUTO-DIMMING MIRROR - VEHICLE IN REVERSE AND NIGHTTIME CONDITIONS WITH GLARE
|
-
NOTE:
Covering the sensor(s) with a finger or hand is not adequate for this step.
Continue to illuminate the rearward facing sensor with the forward facing sensor covered.
Did the mirror adjust to a high reflectance (clear) state after reverse was selected?
| Yes
|
The system is operating correctly at this time. REVIEW the operation of the interior auto-dimming mirror feature with the
customer.
|
|
| G8
CHECK FOR VOLTAGE TO THE INTERIOR AUTO-DIMMING MIRROR
|
-
Disconnect Interior Auto-Dimming Mirror C911 (without
) or C9012 (with
).
-
Measure:
Without
|
Positive Lead
|
Measurement / Action
|
Negative Lead
|
|
C911-1
|
|
Ground
|
With
|
Positive Lead
|
Measurement / Action
|
Negative Lead
|
|
C9012-1
|
|
Ground
|
Is the voltage greater than 11 volts?
| No
|
VERIFY that
fuse 36 (15A) is OK. If the fuse is OK, REPAIR the circuit. If the fuse is not OK, REFER to the Wiring Diagrams manual to
identify the possible causes of the circuit short.
|
|
| G9
CHECK FOR GROUND THE INTERIOR AUTO-DIMMING MIRROR
|
-
Measure:
Without
|
Positive Lead
|
Measurement / Action
|
Negative Lead
|
|
C911-4
|
|
Ground
|
With
|
Positive Lead
|
Measurement / Action
|
Negative Lead
|
|
C9012-8
|
|
Ground
|
Is the resistance less than 3 ohms?
| Yes
|
If the vehicle is equipped with an
, GO to
G11
If the vehicle is
not
equipped with an
, GO to
G10
|
|
| G10
CHECK FOR VOLTAGE TO THE REVERSE INPUT CIRCUIT AT THE INTERIOR AUTO-DIMMING MIRROR
|
-
Measure:
|
Positive Lead
|
Measurement / Action
|
Negative Lead
|
|
C911-9
|
|
Ground
|
Is the voltage greater than 11 volts?
| Yes
|
INSTALL a new interior auto-dimming mirror.
|
|
| G11
CHECK FOR IPMA (IMAGE PROCESSING MODULE A)
CONTINUOUS MEMORY DIAGNOSTIC TROUBLE CODES (DTCS)
|
-
Connect Interior Auto-Dimming Mirror C9012
.
-
Using a diagnostic scan tool, check the
Continuous Memory Diagnostic Trouble Codes (CMDTCs).
Are any Diagnostic Trouble Codes (DTCs) present?
| Yes
|
REFER to the
chart in this section.
|
|
| G12
CHECK FOR CORRECT IPMA (IMAGE PROCESSING MODULE A)
OPERATION
|
-
Disconnect and inspect all
connectors.
-
Repair:
-
Corrosion (install new connector or terminals - clean module pins)
-
Damaged or bent pins - install new terminals/pins
-
Pushed-out pins - install new pins as necessary
-
Reconnect the
and all previously disconnected interior mirror system connectors. Make sure all connectors seat and latch correctly.
-
Operate the system to determine if the concern is still present.
Is the concern still present?
| Yes
|
CHECK
for any applicable Technical Service Bulletins (TSBs). If a
exists for this concern, DISCONTINUE this test and FOLLOW the
instructions. If no Technical Service Bulletins (TSBs) address this concern, INSTALL a new
. REFER to
REFER to:
Interior Rear View Mirror
(501-09 Rear View Mirrors, Removal and Installation).
|
| No
|
The system is operating correctly at this time. The concern may have been caused by module connections. ADDRESS the root cause
of any connector or pin issues.
|
|
B12D8:11, B12D8:13
Refer to Wiring Diagrams Cell 124 for schematic and connector information.
Normal Operation and Fault Conditions
The
supplies voltage and ground to the
camera heated windshield element. The
uses input from the front camera and the ambient air temperature to command the heater. The heater may be commanded on if
the ambient temperature is below 5°C (41°F).
Possible Sources
-
Wiring, terminals or connectors
-
-
Camera windshield defrost heater
|
DTC
|
Description
|
Fault Trigger Conditions
|
|
B12D8:11
|
Mirror Heater Output: Circuit Short To Ground
|
Sets on-demand and in continuous memory in the
if an excessive current draw is detected on the heater output circuit.
|
|
B12D8:13
|
Mirror Heater Output: Circuit Open
|
Sets on-demand and in continuous memory in the
if a lower than expected current draw is detected on the heater output circuit.
|
PINPOINT TEST H : B12D8:11, B12D8:13
| H1
CHECK FOR RECORDED DIAGNOSTIC TROUBLE CODES (DTCS) FROM THE IPMA (IMAGE PROCESSING MODULE A)
SELF-TEST
|
-
Using a diagnostic scan tool, perform the
self-test.
Is
B12D8:11 or B12D8:13 present?
| Yes
|
For
B12D8:11, GO to
H2
For
B12D8:13, GO to
H5
|
| No
|
The system is operating correctly at this time. INSPECT the connectors, wiring and the camera windshield defrost heater for
damage or poor connections.
|
|
| H2
CHECK FOR DTC (DIAGNOSTIC TROUBLE CODE)
B12D8:11 WITH THE HEATER DISCONNECTED
|
-
Disconnect Rain Sensor Module C914
.
-
Using a diagnostic scan tool, clear the
Diagnostic Trouble Codes (DTCs).
Is DTC B12D8:11 stored?
|
| H3
CHECK THE HEATER OUTPUT CIRCUIT FOR A SHORT TO GROUND
|
-
Disconnect Interior Auto-Dimming Mirror C9012
.
-
Measure:
|
Positive Lead
|
Measurement / Action
|
Negative Lead
|
|
C9012-12
|
|
Ground
|
Is the resistance greater than 10,000 ohms?
|
| H4
CHECK THE HEATER CIRCUITS FOR A SHORT TOGETHER
|
-
Measure:
|
Positive Lead
|
Measurement / Action
|
Negative Lead
|
|
C9012-12
|
|
C9012-16
|
Is the resistance greater than 10,000 ohms?
|
| H5
CHECK FOR DTC B12D8:13 WITH THE HEATER CIRCUITS JUMPERED TOGETHER
|
-
Disconnect Rain Sensor Module C914
.
-
Connect:
|
Lead 1
|
Measurement / Action
|
Lead 2
|
|
C914-1
|
|
C914-3
|
-
Using a diagnostic scan tool, clear the
Diagnostic Trouble Codes (DTCs).
Is
B12D8:11 present?
| No
|
REMOVE the fused jumper wire.
GO to
H6
|
|
| H6
CHECK THE HEATER CIRCUITS FOR AN OPEN
|
-
Disconnect Interior Auto-Dimming Interior Mirror C9012
.
-
Measure the resistance between:
|
Positive Lead
|
Measurement / Action
|
Negative Lead
|
|
C9012-12
|
|
C914-3
|
|
C9012-16
|
|
C914-1
|
Are the resistances less than 3 ohms?
| No
|
REPAIR the affected circuit.
|
|
| H7
CHECK FOR CORRECT IPMA (IMAGE PROCESSING MODULE A)
OPERATION
|
-
Disconnect and inspect all
) connectors.
-
Repair:
-
corrosion (install new connector or terminals - clean module pins)
-
damaged or bent pins - install new terminals/pins
-
pushed-out pins - install new pins as necessary
-
Reconnect the
and all previously disconnected interior mirror system connectors. Make sure all connectors seat and latch correctly.
-
Operate the system to determine if the concern is still present.
Is the concern still present?
| Yes
|
CHECK
for any applicable Technical Service Bulletins (TSBs). If a
exists for this concern, DISCONTINUE this test and FOLLOW the
instructions. If no Technical Service Bulletins (TSBs) address this concern, INSTALL a
. REFER to
REFER to:
Interior Rear View Mirror
(501-09 Rear View Mirrors, Removal and Installation).
|
| No
|
The system is operating correctly at this time. The concern may have been caused by module connections. ADDRESS the root cause
of any connector or pin issues.
|
|
U0100:87
Refer to Wiring Diagrams Cell 14 for schematic and connector information.
Normal Operation and Fault Conditions
The
communicates with the
through the
Possible Sources
-
Communication concern
-
-
concern
-
|
DTC
|
Description
|
Fault Trigger Conditions
|
|
U0100:87
|
Lost Communication With ECM/PCM "A": Missing Message
|
Sets in continuous memory in the
if data messages received from the
through the
are missing for 0.5 second or more.
|
PINPOINT TEST I : U0100:87
| I1
VERIFY THAT THE SCAN TOOL COMMUNICATES WITH THE PCM (POWERTRAIN CONTROL MODULE)
|
-
Connect the diagnostic scan tool.
-
Check that a vehicle session can be established using the scan tool.
Can a vehicle session be established?
|
| I2
RETRIEVE THE RECORDED DTCS FROM THE PCM (POWERTRAIN CONTROL MODULE)
KOEO (KEY ON, ENGINE OFF)
SELF-TEST
|
-
Using a diagnostic scan tool, perform the
self-test.
Are any Diagnostic Trouble Codes (DTCs) recorded?
| Yes
|
DIAGNOSE any
Diagnostic Trouble Codes (DTCs). REFER to Section 3 of the
manual or Refer to the appropriate section in Group 303 for the procedure.
|
|
| I3
CHECK THE IPMA (IMAGE PROCESSING MODULE A)
CONTINUOUS MEMORY DIAGNOSTIC TROUBLE CODES (DTCS)
|
-
Using a diagnostic scan tool, clear the
Diagnostic Trouble Codes (DTCs).
-
Retrieve the
continuous memory Diagnostic Trouble Codes (DTCs).
Is
U0100:87 retrieved again?
| No
|
The system is operating correctly at this time. This
may have been set due to high network traffic or an intermittent fault condition.
|
|
| I4
CHECK THE GWM (GATEWAY MODULE A)
DIAGNOSTIC TROUBLE CODES (DTCS)
|
-
Using a diagnostic scan tool, retrieve the
Diagnostic Trouble Codes (DTCs).
Are any
Diagnostic Trouble Codes (DTCs) present?
|
| I5
CHECK FOR DTC (DIAGNOSTIC TROUBLE CODE)
U0100:00 OR U0100:87 SET IN OTHER MODULES
|
-
Using a scan tool, retrieve the continuous memory Diagnostic Trouble Codes (DTC) from all modules.
Is
U0100:00 or U0100:87 set in any other module?
| Yes
|
INSTALL a new
. Refer to the appropriate section in Group 303 for the procedure.
|
|
U0104:87
Diagnostic Overview
Diagnostics in this manual assume a certain skill level and knowledge of Ford-specific diagnostic practices.
REFER to:
Diagnostic Methods
(100-00 General Information, Description and Operation).
Refer to Wiring Diagrams Cell 14 for schematic and connector information.
Normal Operation and Fault Conditions
The
communicates with the
on the High Speed Controller Area Network 2 (HS2-CAN).
Possible Sources
|
DTC
|
Description
|
Fault Trigger Conditions
|
|
U0104:87
|
Lost Communication With Cruise Control Module: Missing Message
|
Sets in continuous memory in the
if data messages received from the
are missing for 1 second or more.
|
PINPOINT TEST J : U0104:87
| J1
VERIFY THE CUSTOMER CONCERN
|
-
Verify that there is an observable symptom present.
Is an observable symptom present?
| No
|
The system is operating normally at this time. The
may have been set due to high network traffic or an intermittent fault condition.
|
|
| J2
CHECK THE COMMUNICATION NETWORK
|
-
Using a diagnostic scan tool, perform the network test.
Does the
pass the network test?
|
| J3
RETRIEVE THE RECORDED DIAGNOSTIC TROUBLE CODES (DTCS) FROM THE CCM (CRUISE CONTROL MODULE)
SELF-TEST
|
-
Using a diagnostic scan tool, perform the
self-test.
Are any Diagnostic Trouble Codes (DTCs) recorded?
| Yes
|
DIAGNOSE the
Diagnostic Trouble Codes (DTCs).
REFER to:
Cruise Control
(419-03A Cruise Control, Diagnosis and Testing).
|
|
| J4
RECHECK THE IPMA (IMAGE PROCESSING MODULE A)
CONTINUOUS MEMORY DIAGNOSTIC TROUBLE CODES (DTCS)
|
-
Using a diagnostic scan tool, clear the
Diagnostic Trouble Codes (DTCs).
-
Retrieve the
Continuous Memory Diagnostic Trouble Codes (CMDTCs).
Is
U0104:87 still present?
| No
|
The system is operating correctly at this time. The
may have been set due to high network traffic or an intermittent fault condition.
|
|
| J5
CHECK FOR DTC U0104:00 OR U0104:87 SET IN OTHER MODULES
|
-
Using a diagnostic scan tool, clear all Diagnostic Trouble Codes (DTCs).
-
Retrieve the continuous memory Continuous Memory Diagnostic Trouble Codes (CMDTCs) from all modules.
Is
U0104:00 or U0104:87 set in any other module?
|
U0131:87
Refer to Wiring Diagrams Cell 14 for schematic and connector information.
Normal Operation and Fault Conditions
The
communicates with the
through the High Speed Controller Area Network 2 (HS2-CAN).
Possible Sources
|
DTC
|
Description
|
Fault Trigger Conditions
|
|
U0131:87
|
Lost Communication With Power Steering Control Module: Missing Message
|
Sets in continuous memory in the
if data messages received from the
are missing for 0.15 second or more.
|
PINPOINT TEST K : U0131:87
| K1
VERIFY THE CUSTOMER CONCERN
|
-
Verify there is an observable symptom present.
Is there an observable symptom present?
| No
|
The system is operating normally at this time. The
may have been set due to high network traffic or an intermittent fault condition.
|
|
| K2
CHECK THE COMMUNICATION NETWORK
|
-
Using a diagnostic scan tool, perform a network test.
Does the
pass the network test?
|
| K3
RETRIEVE THE RECORDED DIAGNOSTIC TROUBLE CODES (DTCS) FROM THE PSCM (POWER STEERING CONTROL MODULE)
SELF-TEST
|
-
Using a diagnostic scan tool, perform the
self-test.
Are any Diagnostic Trouble Codes (DTCs) present?
| Yes
|
REFER to:
Power Steering
(211-02 Power Steering, Diagnosis and Testing).
|
|
| K4
RECHECK THE IPMA (IMAGE PROCESSING MODULE A)
CONTINUOUS MEMORY DTCS
|
-
Using a diagnostic scan tool, clear the
Diagnostic Trouble Codes (DTCs).
-
Retrieve the
Continuous Memory Diagnostic Trouble (CMDTCs).
Is
U0131:87 still present?
| No
|
The system is operating correctly at this time. The
may have been set due to high network traffic or an intermittent fault condition.
|
|
| K5
CHECK FOR DTC U0131:00 OR U0131:87 SET IN OTHER MODULES
|
-
Using a diagnostic scan tool, clear all Diagnostic Trouble Codes (DTCs).
-
Retrieve the Continuous Memory Diagnostic Trouble Codes (DTCs) from all modules.
Is
U0131:00 or U0131:87 set in any other module?
| Yes
|
INSTALL a new
.
REFER to:
Steering Gear
(211-02 Power Steering, Removal and Installation).
|
|
U0140:87
Refer to Wiring Diagrams Cell 14 for schematic and connector information.
Normal Operation and Fault Conditions
The
communicates with the
through the
.
Possible Sources
|
DTC
|
Description
|
Fault Trigger Conditions
|
|
U0140:87
|
Lost Communication With Body Control Module: Missing Message
|
Sets in continuous memory in the
if data messages received from the
are missing for 5 seconds or more.
|
PINPOINT TEST L : U0140:87
| L1
VERIFY THE CUSTOMER CONCERN
|
-
Verify that there is an observable symptom present.
Is there an observable symptom present?
| No
|
The system is operating normally at this time. The
may have been set due to high network traffic or an intermittent fault condition.
|
|
| L2
CHECK THE COMMUNICATION NETWORK
|
-
Using a diagnostic scan tool, perform a network test.
Do the
and the
pass the network test?
|
| L3
CHECK FOR RECORDED DIAGNOSTIC TROUBLE CODES (DTCS) FROM THE BCM (BODY CONTROL MODULE)
SELF-TEST
|
-
Using a diagnostic scan tool, perform the
SELF-TEST
Are any Diagnostic Trouble Codes (DTCs) recorded?
|
| L4
RECHECK THE IPMA (IMAGE PROCESSING MODULE A)
CONTINUOUS MEMORY DTCS
|
-
Using a diagnostic scan tool, clear the
Diagnostic Trouble Codes (DTCs).
-
Retrieve the
Continuous Memory Diagnostic Trouble Codes (CMDTCs).
Is DTC U0140:87 still present?
| No
|
The system is operating correctly at this time. The
may have been set due to high network traffic or an intermittent fault condition.
|
|
| L5
CHECK THE GWM (GATEWAY MODULE A)
DIAGNOSTIC TROUBLE CODES (DTCS)
|
-
Using a diagnostic scan tool, retrieve the
Continuous Memory Diagnostic Trouble Codes (CMDTCs).
Are any
Diagnostic Trouble Codes (DTCs) present?
|
| L6
CHECK FOR DTC (DIAGNOSTIC TROUBLE CODE)
U0140:00 OR U0140:87 SET IN OTHER MODULES
|
-
Using a scan tool, clear all Diagnostic Trouble Codes (DTCs).
-
Retrieve the Continuous Memory Diagnostic Trouble Codes (CMDTCs) from all modules.
Is
U0140:00 or U0140:87 set in any other module?
|
U0151:87
Refer to Wiring Diagrams Cell 14 for schematic and connector information.
Normal Operation and Fault Conditions
The
communicates with the
through the High Speed Controller Area Network 2 (HS2-CAN).
Possible Sources
|
DTC
|
Description
|
Fault Trigger Conditions
|
|
U0151:87
|
Lost Communication With Restrains Control Module: Missing Message
|
Sets in continuous memory in the I
if data messages received from the
are missing for .5 second or more.
|
PINPOINT TEST M : U0151:87
| M1
VERIFY THE CUSTOMER CONCERN
|
-
Verify there is an observable symptom present.
Is there an observable symptom present?
| No
|
The system is operating normally at this time. The
may have been set due to high network traffic or an intermittent fault condition.
|
|
| M2
CHECK THE COMMUNICATION NETWORK
|
-
Using a diagnostic scan tool, perform a network test.
Does the
pass the network test?
|
| M3
CHECK FOR RECORDED DIAGNOSTIC TROUBLE CODES (DTCS) FROM THE RCM (RESTRAINTS CONTROL MODULE)
SELF-TEST
|
-
Using a diagnostic scan tool, perform the
self-test.
Are any Diagnostic Trouble Codes (DTCs) recorded?
|
| M4
RECHECK THE IPMA (IMAGE PROCESSING MODULE A)
CONTINUOUS MEMORY DIAGNOSTIC TROUBLE CODES (DTCS)
|
-
Using a diagnostic scan tool, clear the
Diagnostic Trouble Codes (DTCs).
-
Retrieve the
Continuous Memory (CMDTCs).
Is
U0151:87 still present?
| No
|
The system is operating correctly at this time. The
may have been set due to high network traffic or an intermittent fault condition.
|
|
| M5
CHECK FOR DTC (DIAGNOSTIC TROUBLE CODE)
U0151:00 OR U0151:87 SET IN OTHER MODULES
|
-
Using a diagnostic scan tool, clear all Diagnostic Trouble Codes (DTCs).
-
Retrieve the Continuous Memory Diagnostic Trouble Codes (CMDTCs) from all modules.
Is DTC U0151:00 or U0151:87 set in any other module?
|
U0155:87
Refer to Wiring Diagrams Cell 14 for schematic and connector information.
Normal Operation and Fault Conditions
The
communicates with the
through the
.
Possible Sources
|
DTC
|
Description
|
Fault Trigger Conditions
|
|
U0155:87
|
Lost Communication With Instrument Panel Cluster (IPC) Control Module: Missing Message
|
Sets in continuous memory in the
if data messages received from the
are missing for 10 seconds or more.
|
PINPOINT TEST N : 155:87
| N1
VERIFY THE CUSTOMER CONCERN
|
-
Verify there is an observable symptom present.
Is there an observable symptom present?
| No
|
The system is operating normally at this time. The
may have been set due to high network traffic or an intermittent fault condition.
|
|
| N2
CHECK THE COMMUNICATION NETWORK
|
-
Using a diagnostic scan tool, perform a network test.
Do the
and the
pass the network test?
|
| N3
CHECK FOR RECORDED DIAGNOSTIC TROUBLE CODES (DTCS) FROM THE IPC (INSTRUMENT PANEL CLUSTER)
SELF-TEST
|
-
Using a diagnostic scan tool, perform the
SELF-TEST
Are any Diagnostic Trouble Codes (DTCs) recorded?
|
| N4
RECHECK THE IPMA (IMAGE PROCESSING MODULE A)
CONTINUOUS MEMORY DIAGNOSTIC TROUBLE CODES (DTCS)
|
-
Using a diagnostic scan tool, clear the
Diagnostic Trouble Codes (DTCs).
-
Retrieve the
Continuous Memory Diagnostic Trouble Codes (CMDTCs).
Is DTC U0155:87 still present?
| No
|
The system is operating correctly at this time. The
may have been set due to high network traffic or an intermittent fault condition.
|
|
| N5
CHECK THE GWM (GATEWAY MODULE A)
DIAGNOSTIC TROUBLE CODES (DTCS)
|
-
Using a diagnostic scan tool, retrieve the
Diagnostic Trouble Codes (DTCs).
Are any
Diagnostic Trouble Codes (DTCs) present?
|
| N6
CHECK FOR DTC (DIAGNOSTIC TROUBLE CODE)
U0155:00 OR U0155:87 SET IN OTHER MODULES
|
-
Using a diagnostic scan tool, clear all Diagnostic Trouble Codes (DTCs).
-
Retrieve the Continuous Memory Diagnostic Trouble Codes (CMDTCs) from all modules.
Is
U0155:00 or U0155:87 set in any other module?
|
U0212:87
Refer to Wiring Diagrams Cell 14 for schematic and connector information.
Normal Operation and Fault Conditions
The
communicates with the
on the High Speed Controller Area Network 2 (HS2-CAN).
Possible Sources
|
DTC
|
Description
|
Fault Trigger Conditions
|
|
U0212:87
|
Lost Communication With Steering Column Control Module: Missing Message
|
Sets in continuous memory in the
if data messages received from the
are missing for 10 seconds or more.
|
PINPOINT TEST O : U0212:87
| O1
VERIFY THE CUSTOMER CONCERN
|
-
Verify there is an observable symptom present.
Is there an observable symptom present?
| No
|
The system is operating normally at this time. The
may have been set due to high network traffic or an intermittent fault condition.
|
|
| O2
CHECK THE COMMUNICATION NETWORK
|
-
Using a diagnostic scan tool, perform a network test.
Does the
pass the network test?
|
| O3
CHECK FOR RECORDED DIAGNOSTIC TROUBLE CODES (DTCS) FROM THE SCCM (STEERING COLUMN CONTROL MODULE)
SELF-TEST
|
-
Using a diagnostic scan tool, perform the
self-test.
Are any Diagnostic Trouble Codes (DTCs) recorded?
|
| O4
RECHECK THE IPMA (IMAGE PROCESSING MODULE A)
CONTINUOUS MEMORY DIAGNOSTIC TROUBLE CODES (DTCS)
|
-
Using a diagnostic scan tool, clear the
Diagnostic Trouble Codes (DTCs).
-
Retrieve the
Continuous Memory Diagnostic Trouble Codes (DTCs).
Is
U0212:87 still present?
| No
|
The system is operating correctly at this time. The
may have been set due to high network traffic or an intermittent fault condition.
|
|
| O5
CHECK FOR DTC (DIAGNOSTIC TROUBLE CODE)
U0212:00 OR U0212:87 SET IN OTHER MODULES
|
-
Using a diagnostic scan tool, clear all Diagnostic Trouble Codes (DTCs).
-
Retrieve the Continuous Memory Diagnostic Trouble Codes (CMDTCs) from all modules.
Is
U0212:00 or U0212:87 set in any other module?
|
U0232:87
Refer to Wiring Diagrams Cell 14 for schematic and connector information.
Normal Operation and Fault Conditions
The
communicates with the
through the
.
Possible Sources
|
DTC
|
Description
|
Fault Trigger Conditions
|
|
U0232:87
|
Lost Communication With Side Obstacle Detection Module - Left: Missing Message
|
Sets in continuous memory in the
if data messages received from the
over the
are missing for 10 seconds or more.
|
PINPOINT TEST P : U0232:87
| P1
VERIFY THE CUSTOMER CONCERN
|
-
Verify that there is an observable symptom present.
Is there an observable symptom present?
| No
|
The system is operating normally at this time. The
may have been set due to high network traffic or an intermittent fault condition.
|
|
| P2
CHECK THE COMMUNICATION NETWORK
|
-
Using a diagnostic scan tool, perform a network test.
Do the
and
pass the network test?
|
| P3
CHECK FOR RECORDED DIAGNOSTIC TROUBLE CODES (DTCS) FROM THE SODL (SIDE OBSTACLE DETECTION CONTROL MODULE LH)
SELF-TEST
|
-
Using a diagnostic scan tool, perform the
self-test.
Are any Diagnostic Trouble Codes (DTCs) recorded?
|
| P4
RECHECK THE IPMA (IMAGE PROCESSING MODULE A)
CONTINUOUS MEMORY DTCS
|
-
Using a diagnostic scan tool, clear the
Diagnostic Trouble Codes (DTCs).
-
Retrieve the
Continuous Memory Diagnostic Trouble Codes (CMDTCs).
Is
U0232:87 still present?
| No
|
The system is operating correctly at this time. The
may have been set due to high network traffic or an intermittent fault condition.
|
|
| P5
CHECK THE GWM (GATEWAY MODULE A)
DIAGNOSTIC TROUBLE CODES (DTCS)
|
-
Using a diagnostic scan tool, retrieve the
Diagnostic Trouble Codes (DTCs).
Are any
Diagnostic Trouble Codes (DTCs) present?
|
| P6
CHECK FOR DTC U0232:00 OR U0232:87 SET IN OTHER MODULES
|
-
Using a diagnostic scan tool, clear all Diagnostic Trouble Codes (DTCs).
-
Retrieve the Continuous Memory Diagnostic Trouble Codes (CMDTCs) from all modules.
Is
U0232:00 or U0232:87 set in any other module?
|
U0233:87
Refer to Wiring Diagrams Cell 14 for schematic and connector information.
Normal Operation and Fault Conditions
The
communicates with the
through the
.
Possible Sources
|
DTC
|
Description
|
Fault Trigger Conditions
|
|
U0233:87
|
Lost Communication With Side Obstacle Detection Module - Right: Missing Message
|
Sets in continuous memory in the
if data messages received from the
are missing for 10 seconds or more.
|
PINPOINT TEST Q : U0233:87
| Q1
VERIFY THE CUSTOMER CONCERN
|
-
Verify that there is an observable symptom present.
Is there an observable symptom present?
| No
|
The system is operating normally at this time. The
may have been set due to high network traffic or an intermittent fault condition.
|
|
| Q2
CHECK THE COMMUNICATION NETWORK
|
-
Using a diagnostic scan tool, perform a network test.
Do the
and
pass the network test?
|
| Q3
CHECK FOR RECORDED DTCS FROM THE SODR (SIDE OBSTACLE DETECTION CONTROL MODULE RH)
SELF-TEST
|
-
Using a diagnostic scan tool, perform the
SELF-TEST
Are any Diagnostic Trouble Codes (DTCs) recorded?
|
| Q4
RECHECK THE IPMA (IMAGE PROCESSING MODULE A)
CONTINUOUS MEMORY DTCS
|
-
Using a diagnostic scan tool, clear the
Diagnostic Trouble Codes (DTCs).
-
Retrieve the
Continuous Memory Diagnostic Trouble Codes (CMDTCs).
Is DTC U0233:87 still present?
| No
|
The system is operating correctly at this time. The
may have been set due to high network traffic or an intermittent fault condition.
|
|
| Q5
CHECK THE GWM (GATEWAY MODULE A)
DIAGNOSTIC TROUBLE CODES (DTCS)
|
-
Using a diagnostic scan tool, retrieve the
Diagnostic Trouble Codes (DTCs).
Are any
Diagnostic Trouble Codes (DTCs) present?
|
| Q6
CHECK FOR DTC (DIAGNOSTIC TROUBLE CODE)
U0233:00 OR U0233:87 SET IN OTHER MODULES
|
-
Using a diagnostic scan tool, clear all Diagnostic Trouble Codes (DTCs).
-
Retrieve the Continuous Memory Diagnostic Trouble Codes (DTCs) from all modules.
Is
U0233:00 or U0233:87 set in any other module?
|
Copyright © Ford Motor Company