| 501-05 Interior Trim and Ornamentation
|
2013 - 2014 Fusion
|
| Removal and Installation
|
Procedure revision date:
06/13/2013
|
Headliner
Removal
NOTICE:
Use care to not crease the headliner during removal and installation or damage to the headliner can occur.
Vehicles equipped with rain sensor or auto dimming mirror
-
Refer to:
Glove Compartment
(501-12 Instrument Panel and Console, Removal and Installation).
-
All vehicles
-
On both sides.
Refer to:
A-Pillar Trim Panel
(501-05 Interior Trim and Ornamentation, Removal and Installation).
-
On both sides.
Refer to:
B-Pillar Trim Panel
(501-05 Interior Trim and Ornamentation, Removal and Installation).
-
On both sides.
Refer to:
C-Pillar Lower Trim Panel
(501-05 Interior Trim and Ornamentation, Removal and Installation).
-
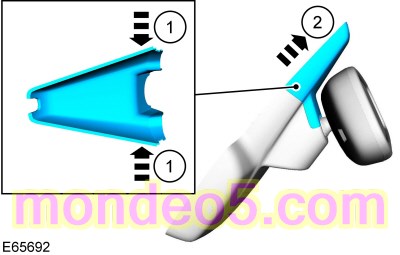
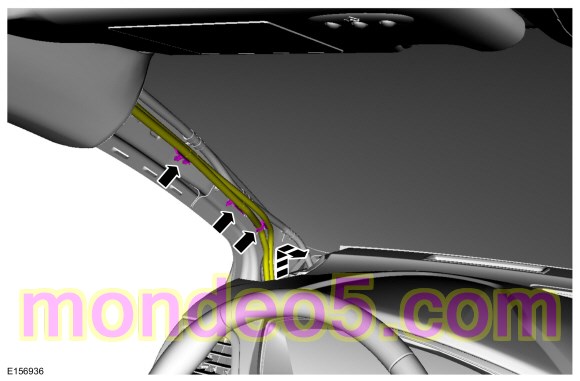
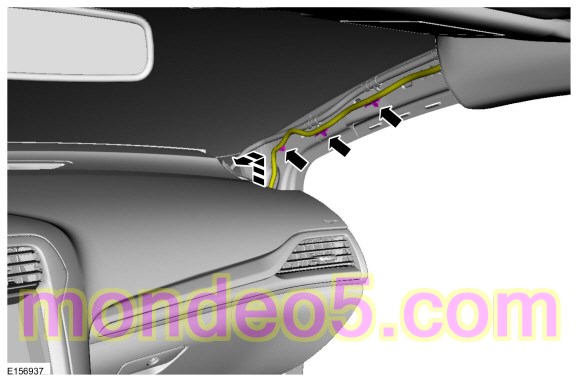
NOTE:
side shown,
side similar.
On both sides.
-
-
Refer to:
Body Control Module (BCM)
(419-10 Multifunction Electronic Modules, Removal and Installation).
-
NOTE:
Instrument panel removed for clarity.
-
NOTE:
Vehicles with roof opening panel shown, vehicles without roof opening panel similar.
NOTE:
Instrument panel removed for clarity.
-
Refer to:
Floor Console
(501-12 Instrument Panel and Console, Removal and Installation).
Vehicles with manual transmission
-
Refer to:
Gearshift Lever
(308-06 Manual Transmission External Controls, Removal and Installation).
Vehicles with automatic transmission
-
Refer to:
Selector Lever Assembly
(307-05 Automatic Transmission External Controls, Removal and Installation).
All vehicles
-
If equipped.
-
If equipped.
-
If equipped.
-
NOTE:
side shown,
side similar.
On both sides.
-
NOTE:
side shown,
side similar.
On both sides.
-
All.
-
NOTE:
Vehicles with roof opening panel shown, vehicles without roof opening panel similar.
Vehicles equipped with rain sensor or auto dimming mirror
-
All vehicles
-
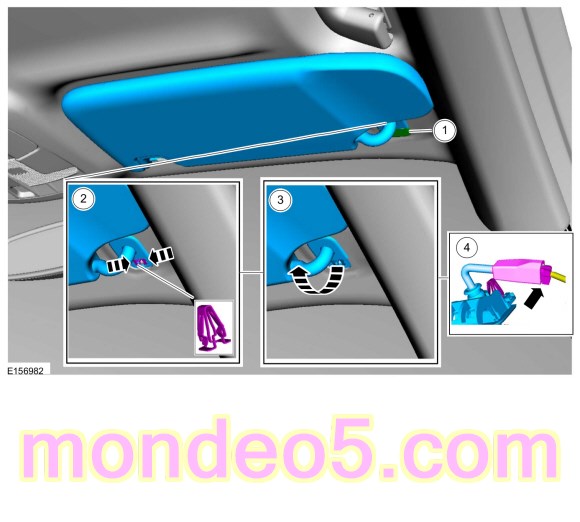
If equipped with roof opening panel, release the seven magnets and two guide pins and magnets.
-
Installation
-
NOTE:
These steps are only necessary when installing a new component.
NOTE:
Obtain the specified adhesive commercially. Depending on the headliner and optional wire harness(es), the purchase of multiple
tubes is suggested.
-
Using tape, mark the wire at the exit points for proper length from headliner-to-body/ roof connectors.
-
Carefully remove the wire harness from the original headliner.
-
Using a marking tool, mark the new headliner with the routing and exit points of the wire harness from the original headliner.
-
NOTICE:
Make sure not to damage the wire harness when cutting the excess adhesive from the wire harness.
Cut and remove any excess adhesive from the wire harness.
-
Position the wire harness onto the new headliner, making sure the harness has enough length to be connected to the body/ roof
connectors at the tape location(s) applied earlier. Apply tape to temporarily hold the wire harness in position on the headliner.
-
Apply the adhesive in the same location as the factory installed adhesive along the full length of the wire harness-to-headliner
to avoid any
concern(s).
Material
: 3M™ Duramix™ Super-Fast Adhesive
/ 4747
-
NOTE:
Transfer parts as necessary.
To install, reverse the removal procedure.
Copyright © Ford Motor Company